SAML implementation in B2B SaaS apps: A Step-by-Step Guide for developers

Enterprise organizations today use multiple applications for various needs, such as project management, CRM, ERP, and HR. To streamline access management, IT admins use centralized identity providers (IdPs) such as Okta and Microsoft Entra ID, which benefit both users and administrators.
Users don’t need to remember multiple passwords; they can use their company’s credentials to log in to different applications. An identity system like Okta simplifies the password reset process and allows administrators to enforce different policies, making user access management of multiple applications easier.
This centralized approach also enhances the organization's security posture, as users don’t need to go through password fatigue of reusing passwords across applications and resetting passwords repeatedly.
To attract enterprise organizations, B2B SaaS applications must facilitate authentication with these centralized identity providers, enabling seamless access. One of the standards facilitating this seamless access is SAML.
In this blog, we will examine SAML and its role in B2B SaaS apps and provide a step-by-step guide for developers to implement SAML using Okta.
Understanding SAML components and concepts
SAML (Security Assertion Markup Language), finalized in 2005 by the OASIS foundation, is designed to promote seamless interoperability between B2B SaaS apps and Identity Providers (IdPs). It is an XML-based framework for authentication and authorization, allowing users to authenticate once and gain access across multiple applications.
Before implementing SAML, let’s review its components and concepts:
- Authentication and Authorization
- Identity Provider and Service Provider
- SAML Request and SAML Response
- SAML Metadata
- SAML Assertions
- SAML Attributes
- SAML Bindings
- SAML Protocols
- SAML Profiles
- Relay State
- XML Signature
Authentication and authorization
Authentication defines how a user is identified and validated using a set of credentials, usually a username and password, during the sign-in process. Authorization, in contrast, defines which resources users have access to. The SAML protocol facilitates this data exchange between an Identity Provider (IdP) and a Service Provider (SP).
Identity Provider (IdP) and Service Provider (SP)
In the context of web browser-based Single Sign-On (SSO), SAML defines two primary roles: the Service Provider (SP) and the Identity Provider (IdP). The SP is the entity that offers a service to the user, typically an application users are trying to log in to. The IdP manages user identities, including profile information and attributes like firstname, nickname, profile URL, and more.
A typical SAML authentication workflow involves the following steps:
- The end user (browser) requests the SP to access a protected resource
- The SP initiates the login by sending a SAML request to the IdP
- The IdP authenticates the user, generates the SAML assertion, and sends it back to the SP
- The SP validates the SAML assertion and ascertains the user's identity
- Based on the identity, the SP grants access to the resource for the user.
- To plan redirects and user journeys, take a look at IDP vs SP initiated SSO.
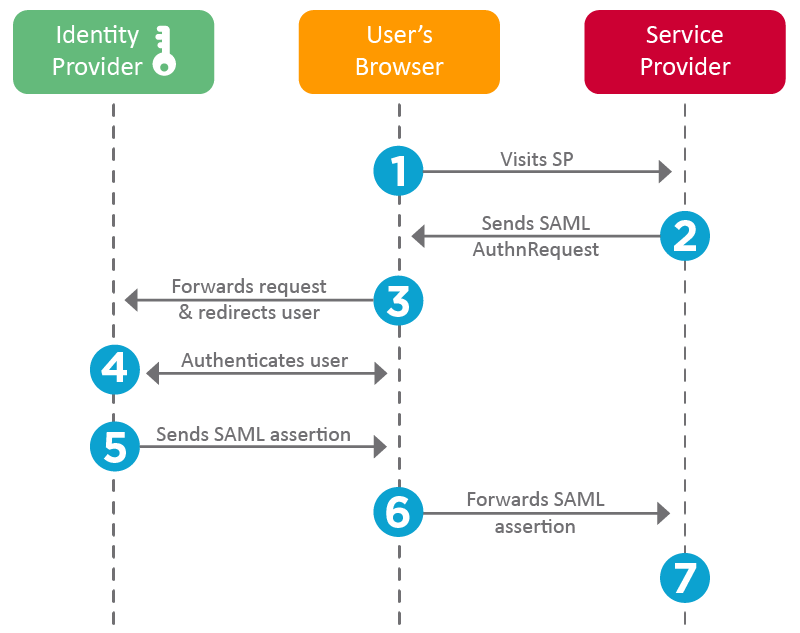
SP accomplishes this using the following three components:
- IdP Certificate: The certificate is stored on the SP application and used for signature verification of the SAML Response.
- Assertion Consumer Service (ACS) URL: This is the endpoint provided by the SP where SAML responses are sent and processed. The SP shares this URL with the IdP.
- IdP Sign-in URL: This is the endpoint on the IdP side where SAML requests are posted. The SP obtains this information from the IdP metadata.
These elements ensure that the SP can securely receive and process SAML assertions, allowing users to authenticate seamlessly.
SAML request and response
When the SP initiates a request to IdP, it is called a SAML Request. When the IdP responds, it is called a SAML Response.
Example of a SAML Request initiated from a SP application:
To view the complete request, refer to the sample_request.xml file.
Example of SAML Response from IdP for authentication with additional attributes.
To view the complete request, refer to the sample_response.xml file.
SAML assertions
SAML Assertions are XML documents issued by the IdP that contain statements about a user. The SP uses these assertions to grant or deny access to resources. Assertions consist of:
- Authentication Statements: Confirm that the user has been authenticated.
- Attribute Statements: Provide additional information about the user (e.g., email, roles).
- Authorization Decision Statements: Indicate the user's access rights.
Assertions serve as the core of SAML authentication, enabling the secure transfer of user identity and attributes between IdP and SP, facilitating Single Sign-On.
SAML attributes
SAML Attributes carry additional user information within assertions. Common attributes include
- NameID: A unique identifier for the user.
- Email: The user's email address.
- Roles: User roles or group memberships.
Attributes enable SPs to enforce fine-grained access control and customize user experiences based on identity information.
XML signature (DSig)
XML Signature ensures the integrity and authenticity of SAML messages. It uses digital signatures to verify that the message has not been altered and comes from a trusted source.
SAML metadata
SAML Metadata provides configuration details about the IdP and SP. The IdP metadata includes entity ID, Single Sign On (SSO), and Single Logout (SLO) endpoints. For the SP, it includes details like the Assertion Consumer Service (ACS) endpoints, entity ID, and certificates. It facilitates interoperability by allowing entities to share and understand each other's configuration.
Example SAML Metadata of IdP.
To view the complete request, refer to the sample_idp-metada.xml file.
SAML bindings
Bindings specify how SAML messages are transported between IdP and SP. Common bindings include
- HTTP Redirect: Transports SAML messages via URL query parameters. Used for sending authentication requests.
- HTTP POST: Encodes SAML messages within an HTML form and uses the POST method. It is commonly used to send SAML responses.
In the above example, IdP SAML Metadata, HTTP POST, and Redirect bindings are defined for specific URLs for SingleSignOnService and SingleLogoutService.
SAML profiles
Profiles define specific use cases for SAML, detailing how assertions, protocols, and bindings should be used together. Common profiles include:
- Web Browser SSO Profile: Facilitates SSO for web applications.
- Single Logout Profile: Allows users to log out from all connected services simultaneously.
Relay state
Relay State is an optional parameter that maintains state information between the IdP and SP during authentication. It typically contains a URL or a reference that the SP will redirect to after authentication. It helps users return to the same page they left off, or be redirected to the home page.
Building a SAML SSO flow with Okta
SAML 2.0 was ratified as an OASIS Standard in March 2005, replacing SAML 1.1. Although introduced in 2005, SAML 2.0 is still widely adopted across many enterprises and SaaS applications. This creates a need to support SAML-based authentication from service and identity providers. One of the identity providers (IdPs) that supports SAML is Okta, allowing developers to configure their applications to use Okta SAML 2.0 SSO Integrations for secure and reliable authentication.
In this section, we’ll examine Okta SAML 2.0 Integration for SSO and build a SAML 2.0 Flow using a sample application.
Use case
We’ll build a simple web application with two pages: login and profile. The login page will feature a "Login with SAML SSO" button. The profile page will display user details such as email, name, and photo, as well as the SAML Response Attributes and the SAML Response itself.
We will use Okta's SAML 2.0 Integration to configure our application for Single Sign-On. In this setup, our application will require a login, and Okta will serve as the IdP, providing authentication details via SAML SSO.
Pre-requisites
Building a SAML SSO Flow using Okta requires the following prerequisites:
- A web application with a login page – We’ve built one using Python and Flask; you can use the same tools to build one. You can find our application in this GitHub repository.
- Okta developer account: Sign up for an Okta developer account if you don’t have one.
Two configurations are needed to build this flow:
- Configure Okta as IdP by creating a new application with SAML 2.0 SSO
- Configure the application with SAML support.
The following sections will describe them.
SAML flow - Configuring Okta as IdP
To integrate SSO with Okta, we must first create a new application from the Okta Dashboard.
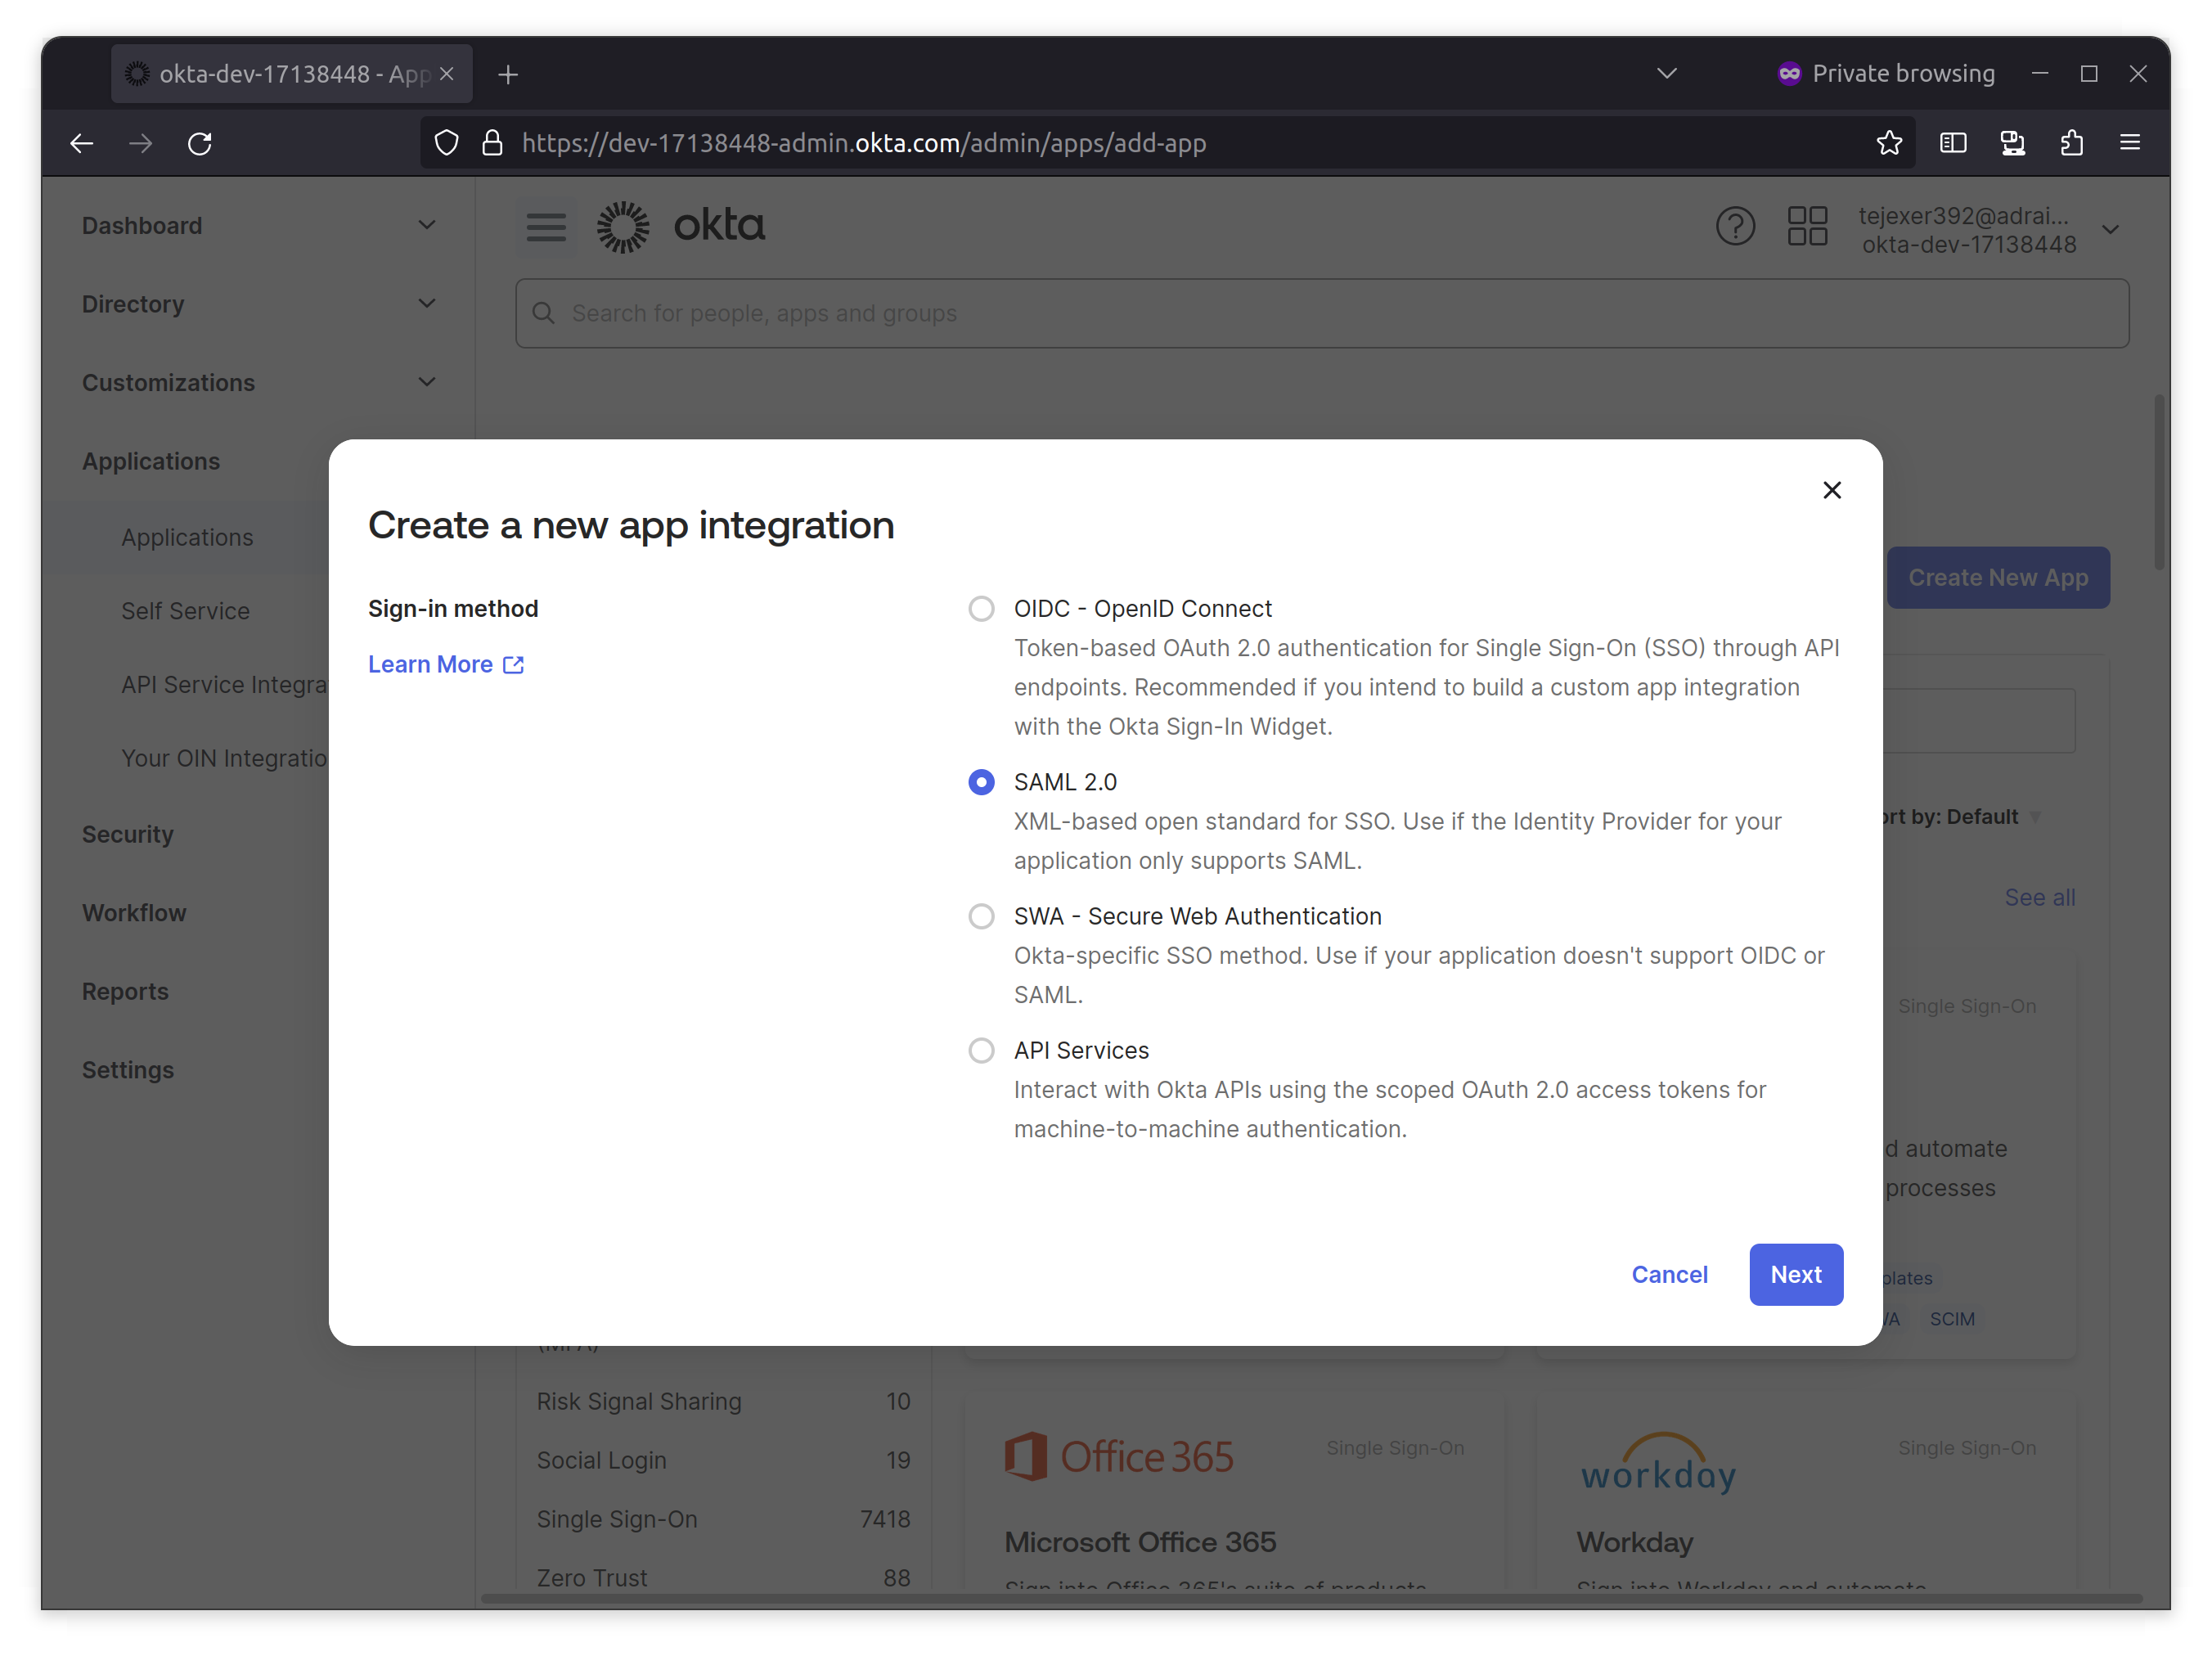
1. Log in to your Okta Developer account, go to Applications from the Okta sidebar, click Create New App, select SAML 2.0, and click Next.
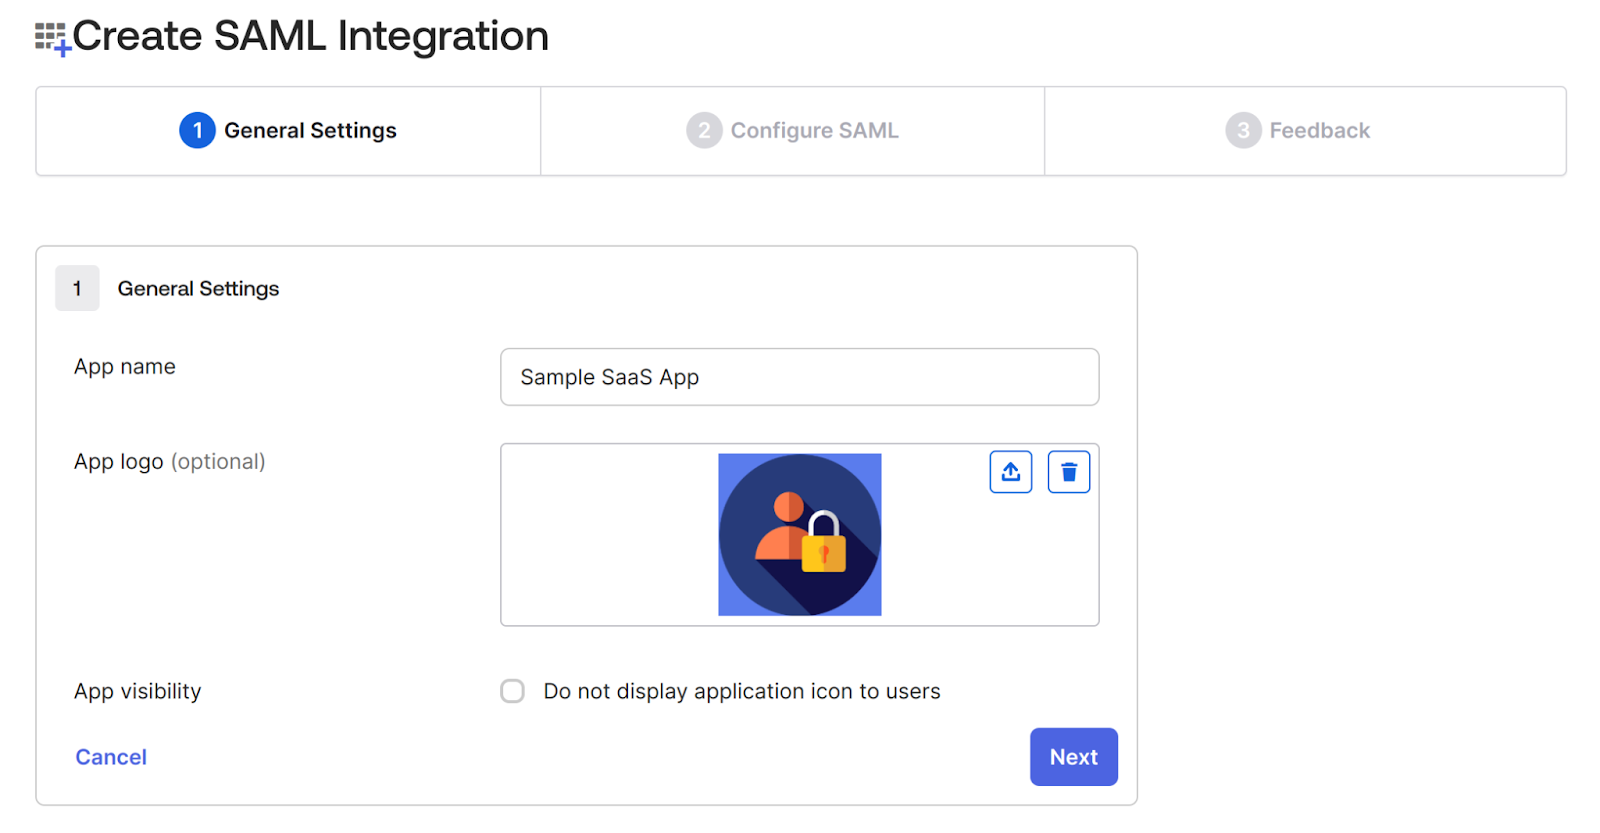
2. On the next screen, provide a name for the application.In this case, we’re adding a Sample SaaS App. You can add a logo to customize the login logo.
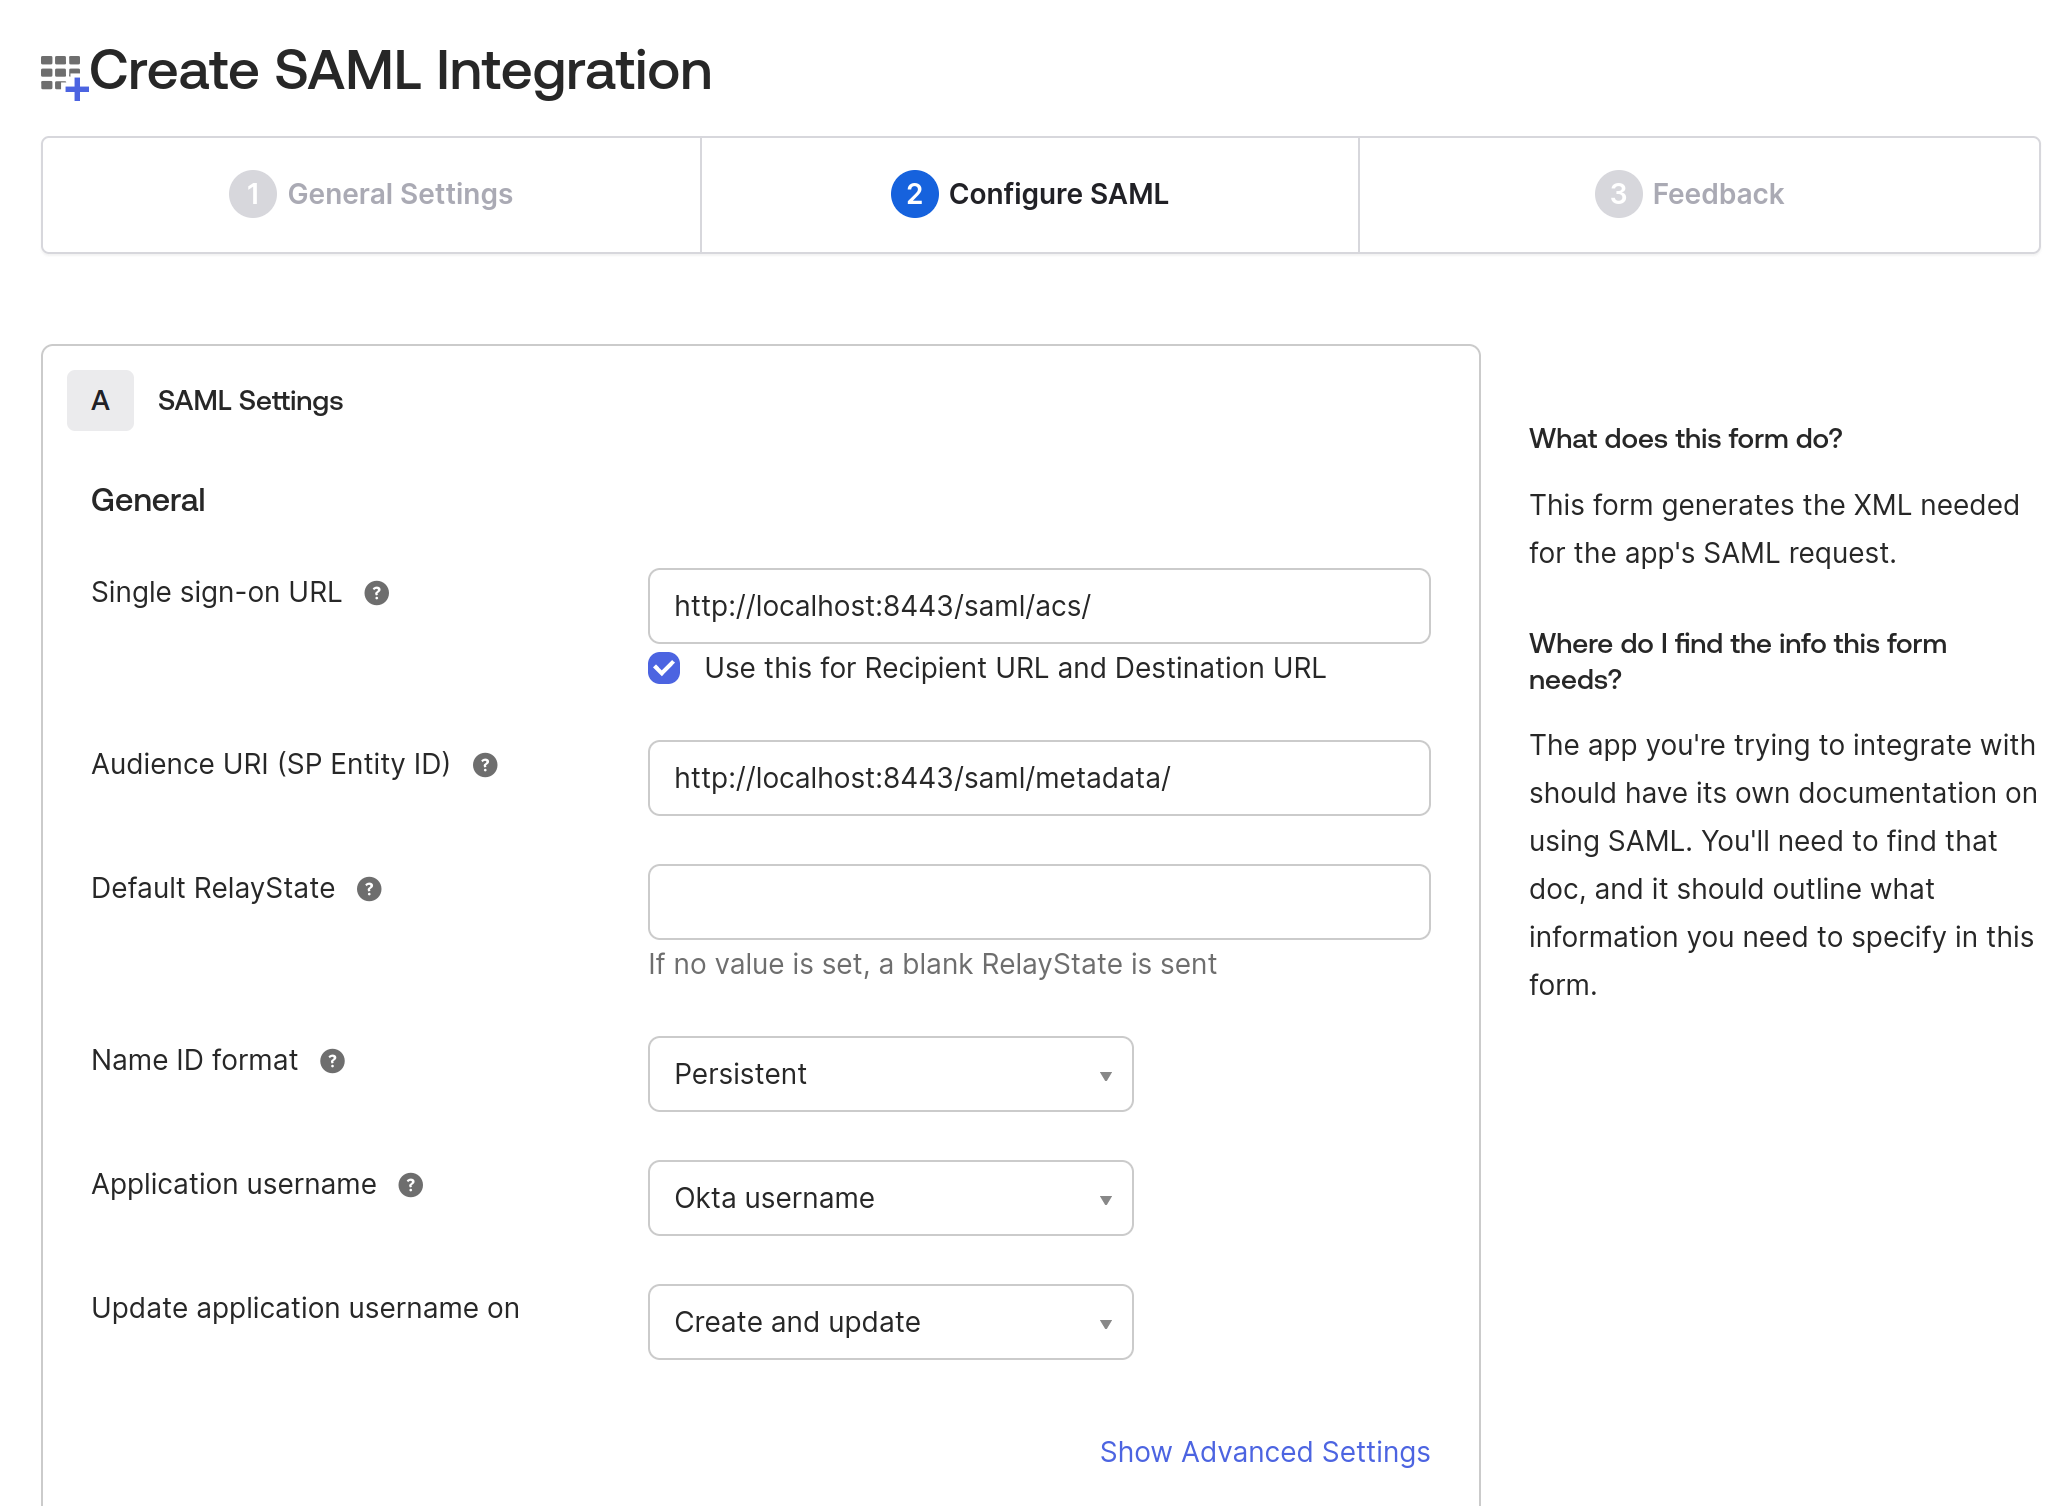
3. In the Configure SAML tab, do the following two things:
- Add the Single Sign-on URL where your application sends the SAML assertion with an HTTP POST, also known as the SAML Assertion Consumer Service (ACS) URL. Sample SaaS App will configure ACS URL at /saml/acs/ and provide SP metadata at this endpoint /saml/metadata.
- Select the Name ID format to Persistent, which identifies the SAML processing rules and constraints for the assertion's subject statement.
4. On the same page, navigate to the Attributes Statements section to configure the following attributes and group attribute statements to be sent when the authentication is successful.
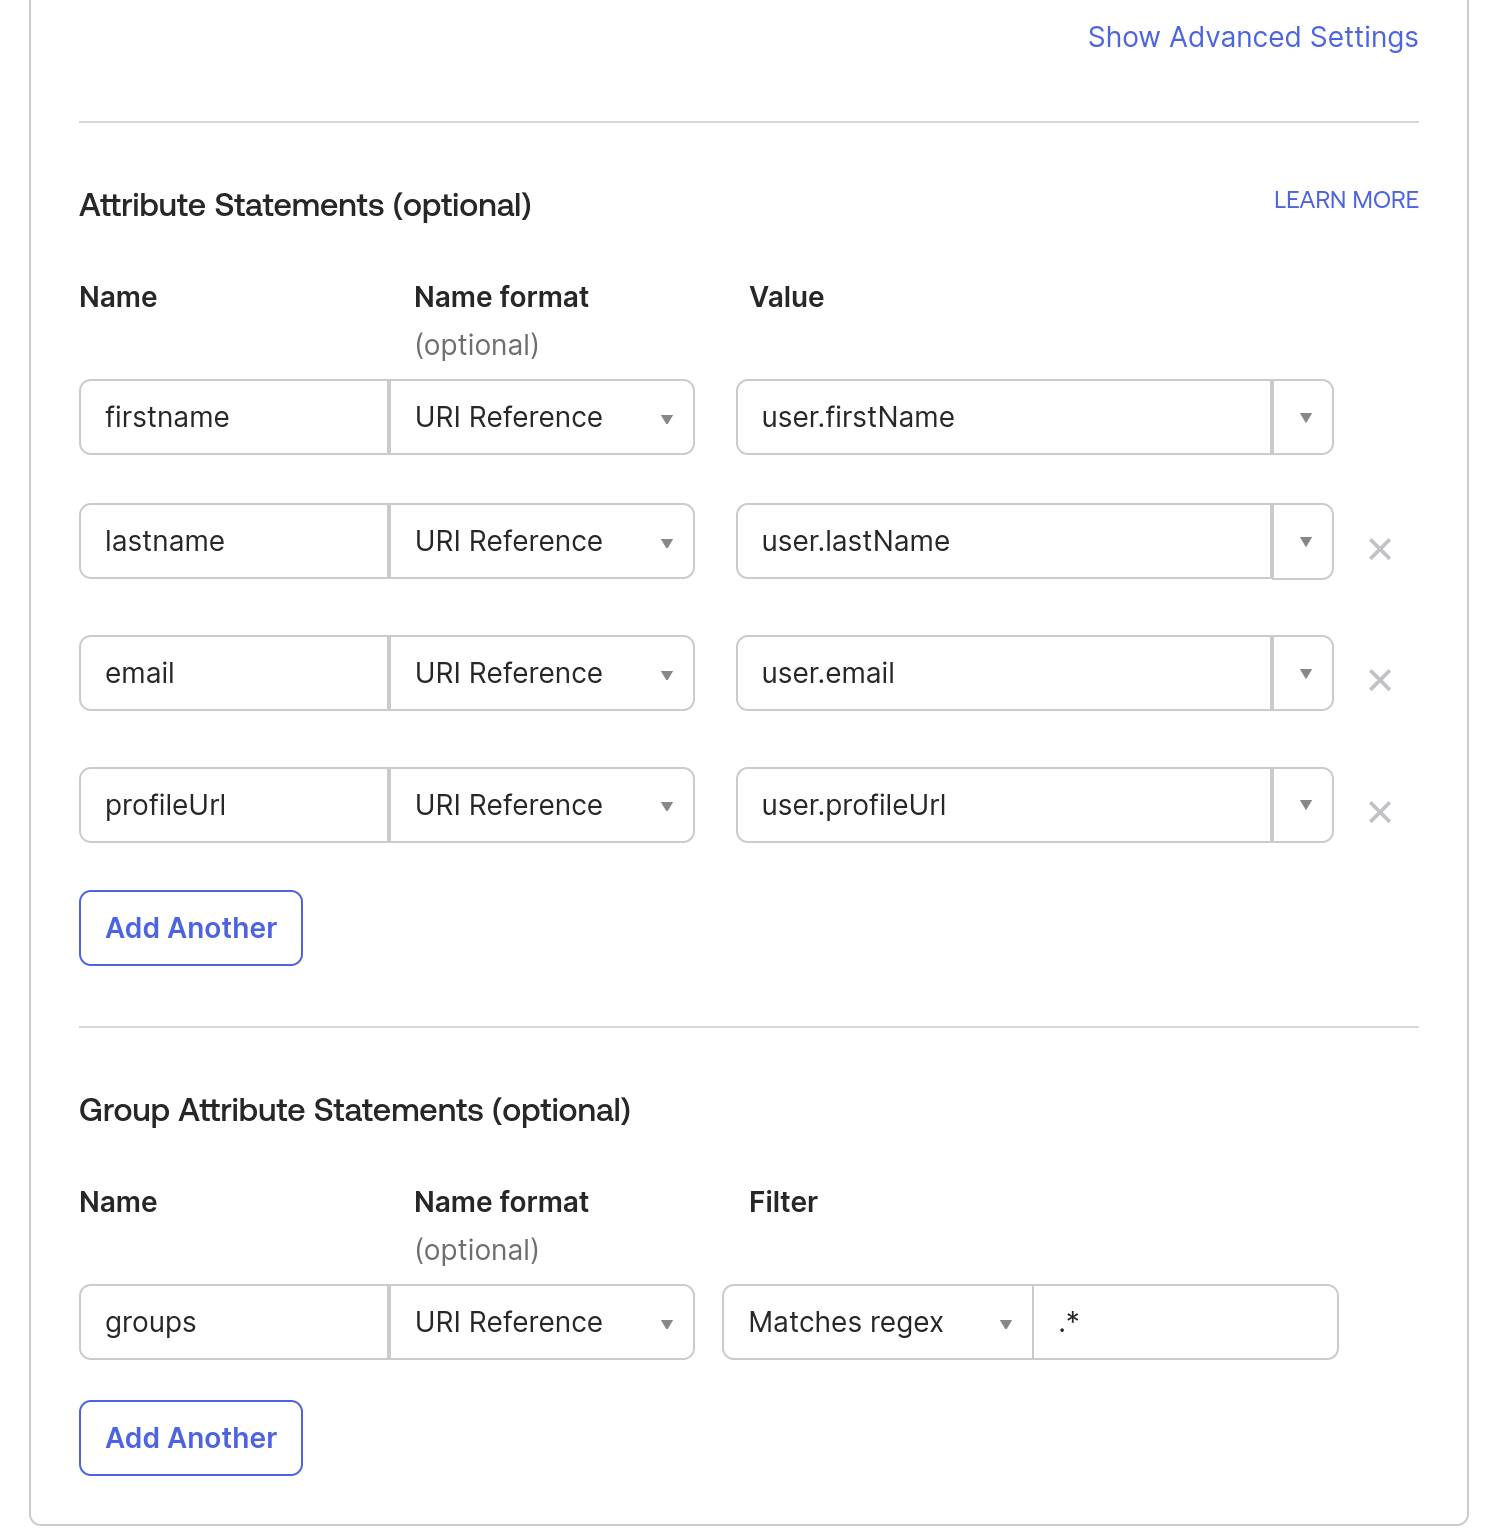
Note: To add more attributes to a User profile, you can go to Directory in the Okta sidebar- > click on Profile Editor -> All User -> Click on Okta User -> Click on Add Attributes.
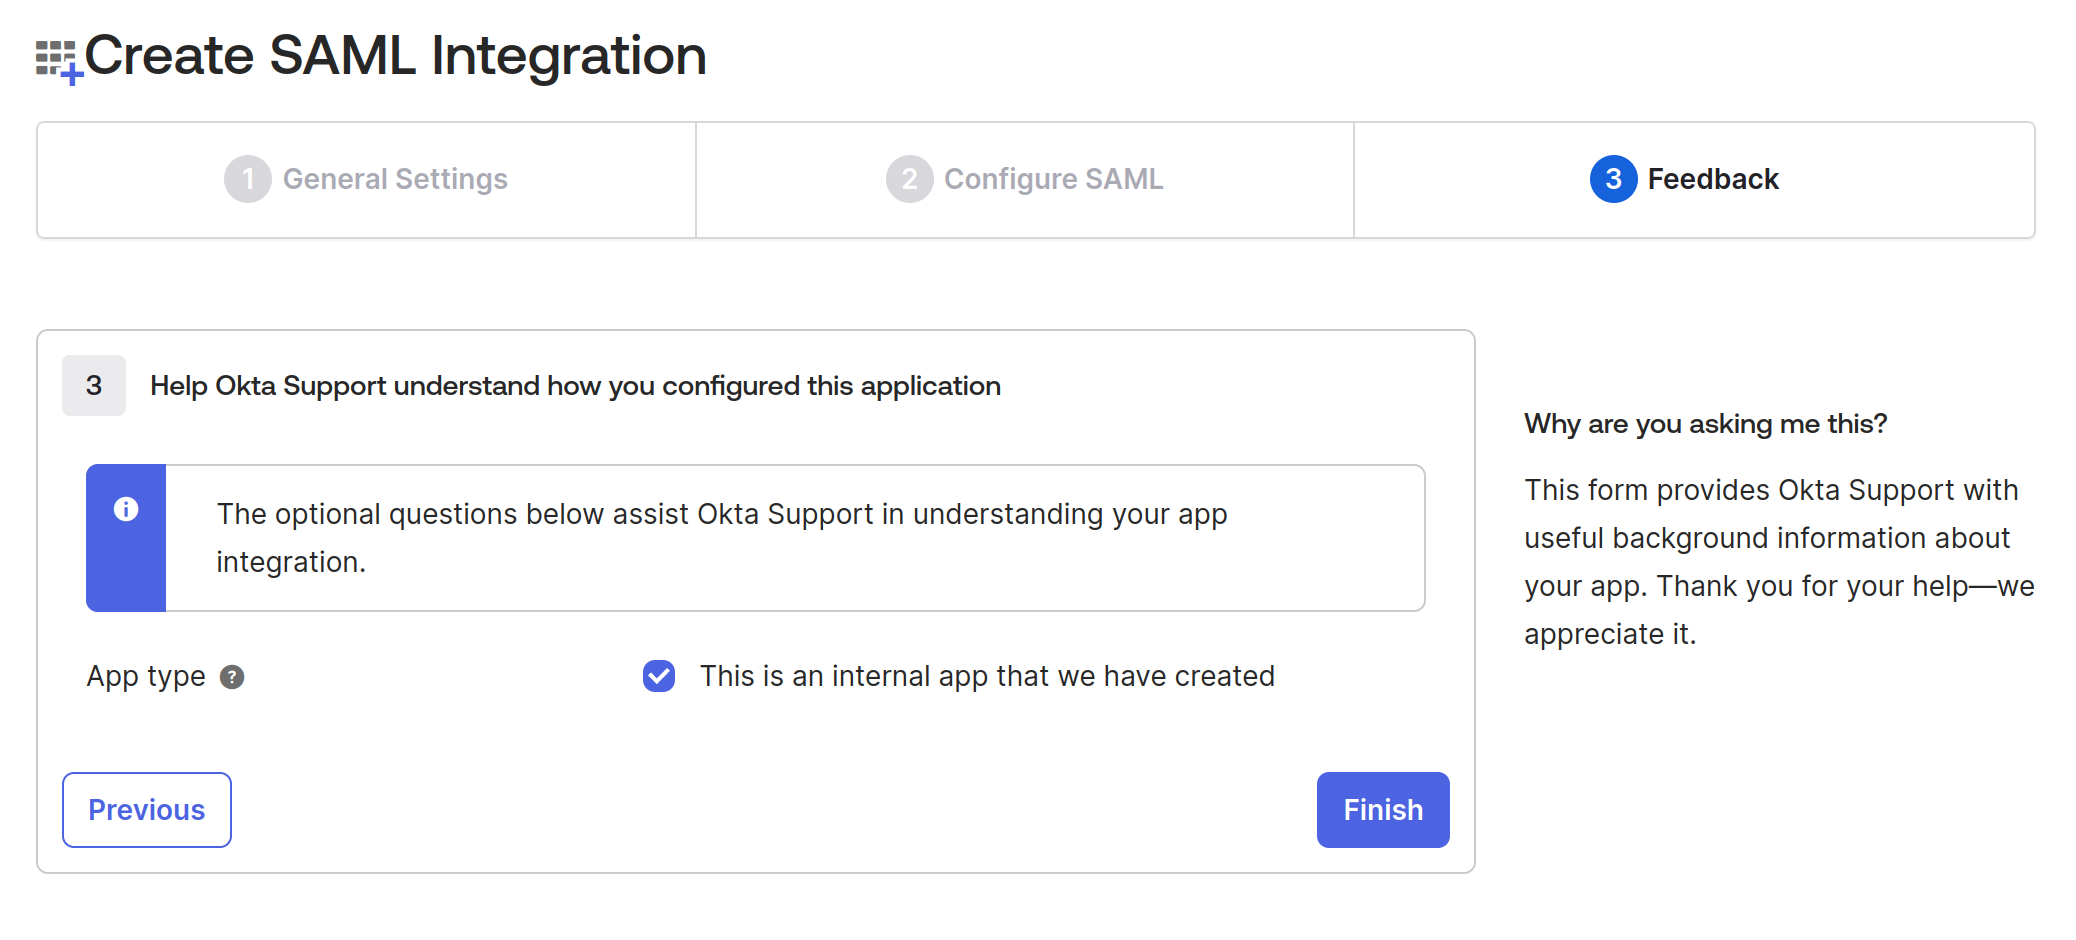
5. In the Feedback tab, check the App type checkbox “This is an internal app that we have created” since we’re testing it and not releasing it publicly. Click Finish.
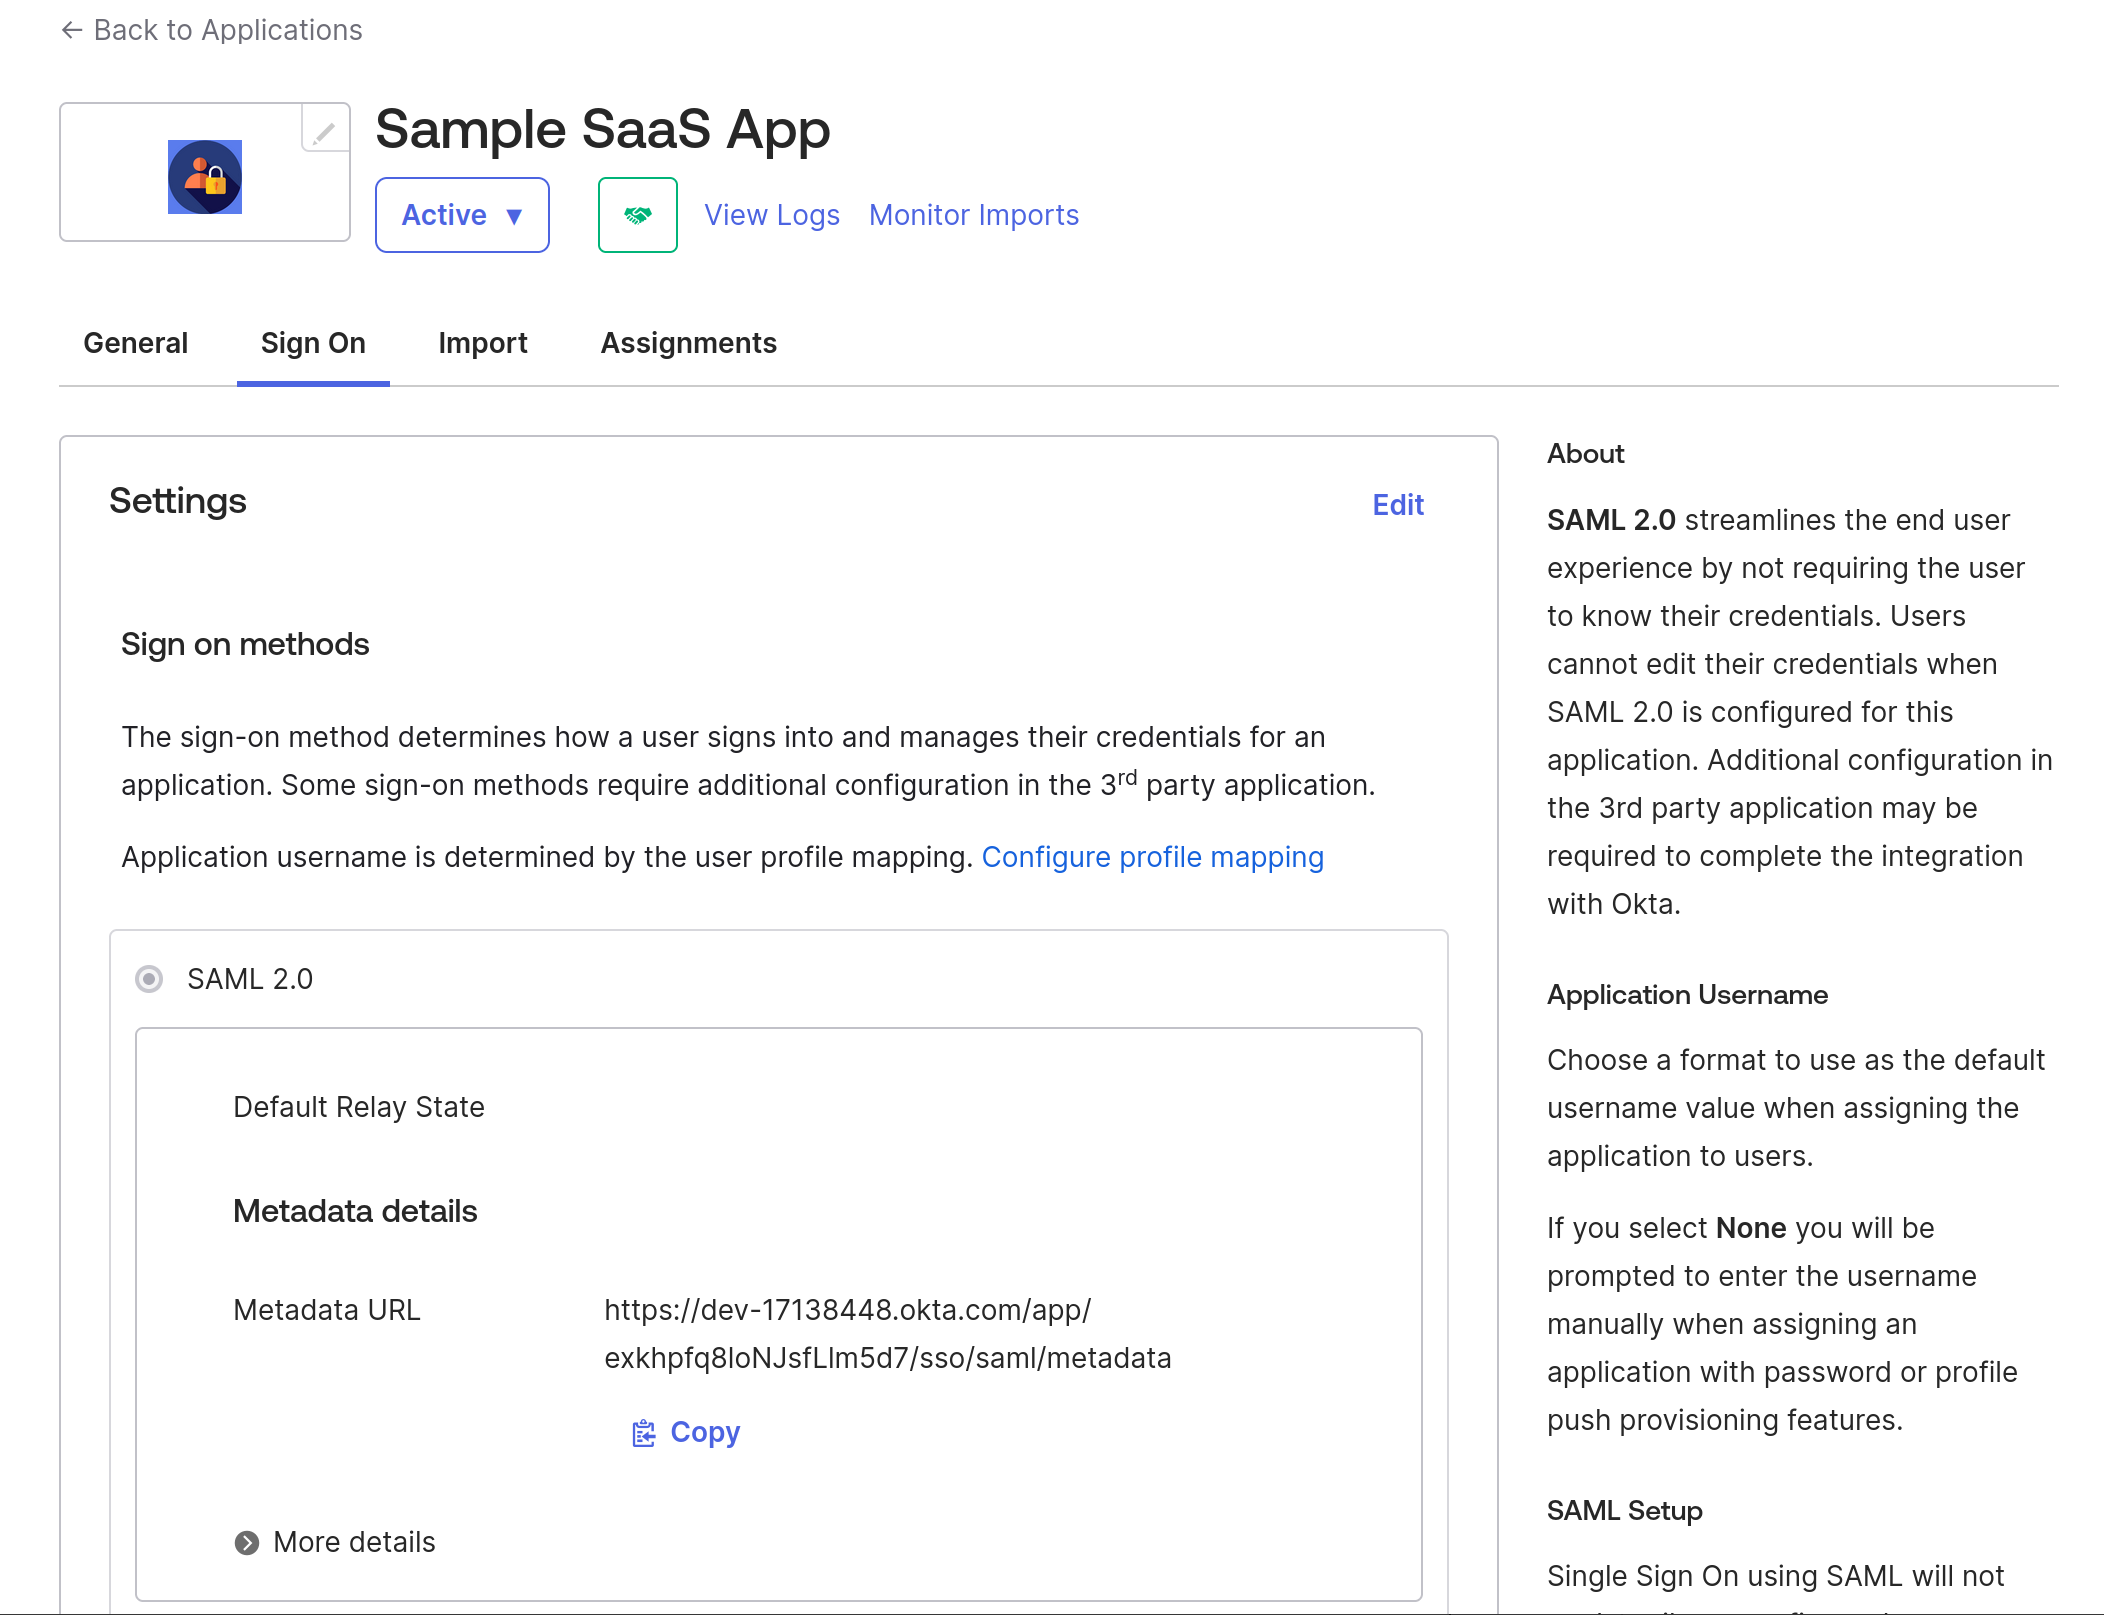
After finishing the application creation, it should show you the Metadata URL, which will have all the details of IdP metadata that we will use in the next step, so download the content from that link and save that XML as idp-metadata.xml
Once the application is created, assign users or groups that will use this application. In this case, we'll use the same user we used to create the Okta account.
6. Go to Sample SaaS App -> Assignment -> Assign -> Assign to People -> Select your user -> click on the Assign button next to your user -> Save and go Back. -> Done.
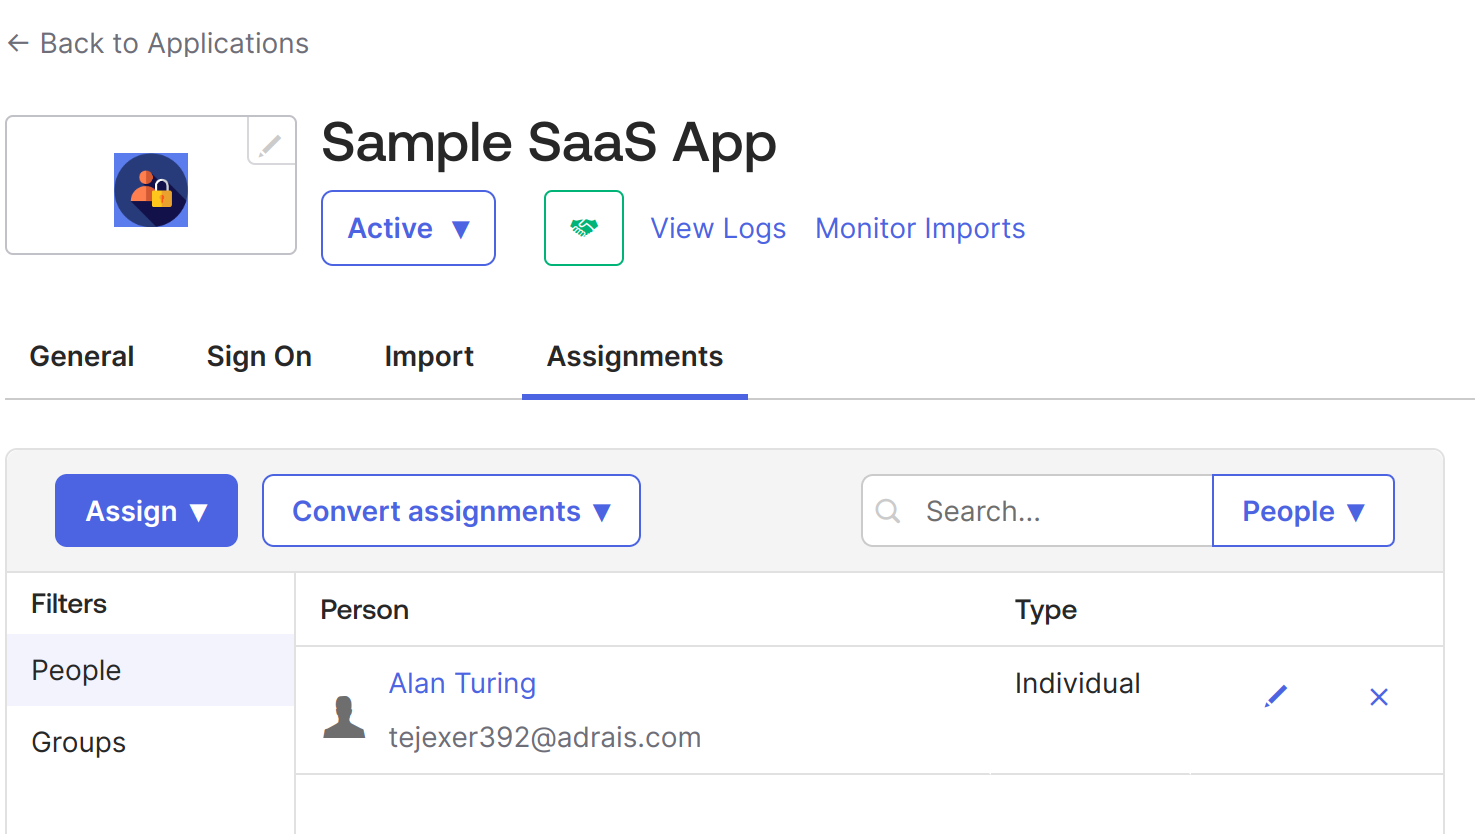
7. Now, do the same for groups. Go to Sample SaaS App -> Assignment -> Assign -> Assign to Groups > click on the Assign button next to your Groups -> Done.
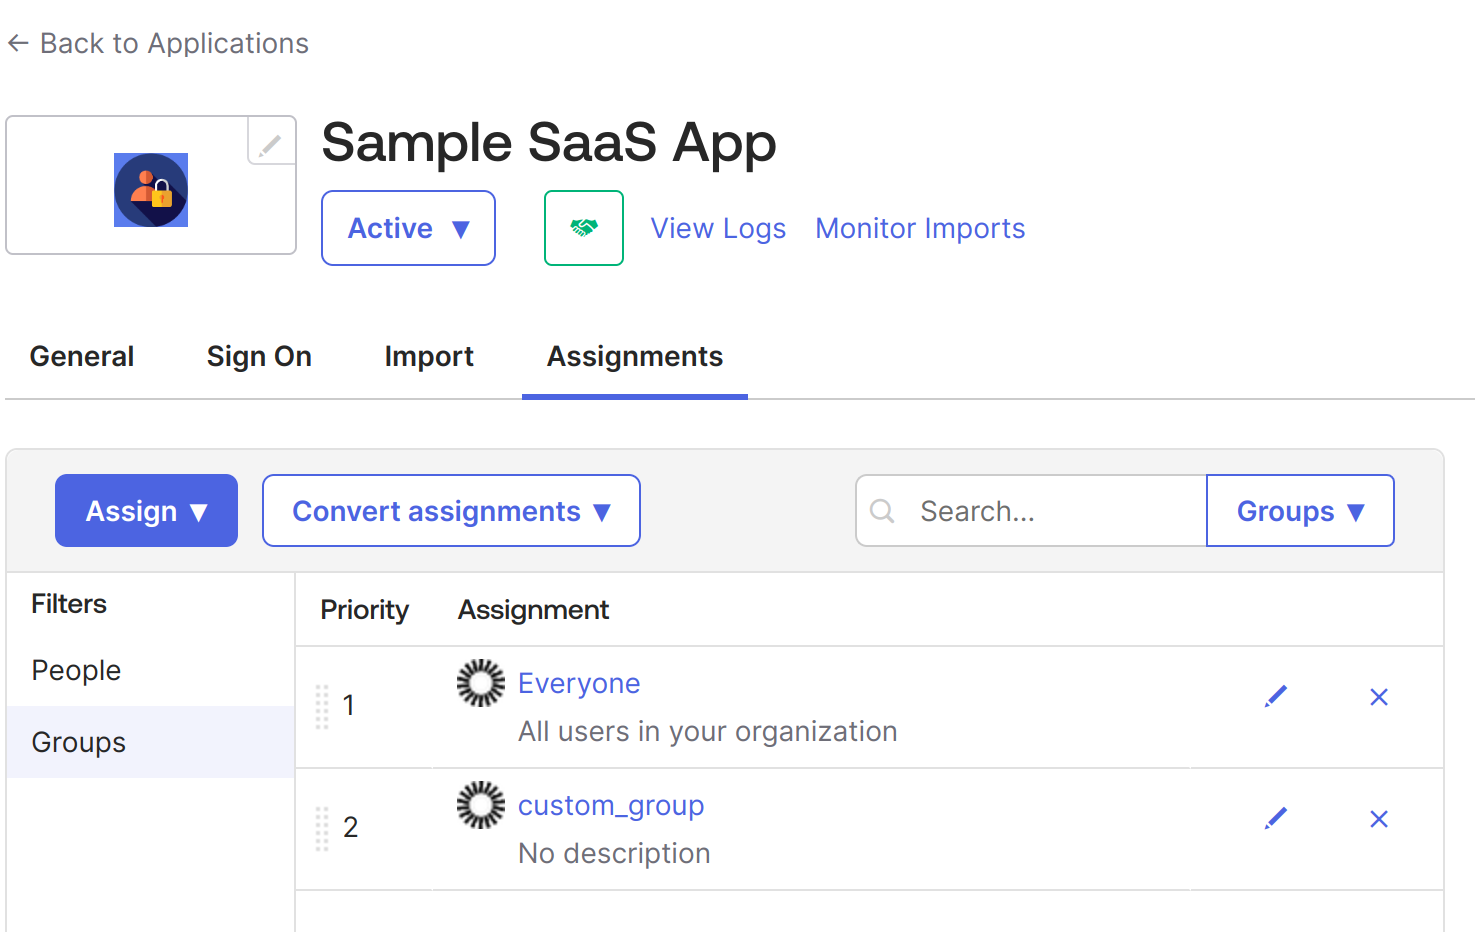
At this point, we have created an application in Okta that will be used for SSO configuration using SAML 2.0. It is an internal application, but we can make it public later as required. When public, it can be available like all other applications in the Okta integrations, such as Google Workspace, Salesforce, etc.
Configuring Sample Application with SAML SSO
As mentioned, we have built a simple web application using Python and Flask. We have also used PySAML2 library that handles SAML 2.0 functionality in Python applications as both SP and IdP.
Below is the repository structure
├── conf
├── LICENSE
├── main.py
├── README.md
├── requirements.txt
├── templates
Move the idp-metadata.xml we downloaded earlier under the conf directory. It should look like this –
conf
├── idp-metadata.xml
├── sp_conf.py

0 directories, 2 files
Now, we need to configure the sp_conf.py file, which contains the SAML settings configuration for the SP application.
In the above file, we have defined the following elements:
- metadata: This links to the idp-metadata.xml placed under the conf folder.
- assertion_consumer_service: This refers to the endpoint to which the SAML response would be directed. In this case, it is /saml/acs/.
- entityid: This defines the SP metadata URL, which is /saml/metadata/ in this case.
Note: If you’re using any other path for idp-metadata or application port, you need to configure it here and update the Okta app integration if there are any changes.
In our main.py, we have configured the saml_client_for function, which provides the SAML client with the defined configuration.
When a user accesses the home page and clicks on login with SSO, the login() function gets triggered at route/login/, which gets the IdP login page URL from the metadata and prepares the SAML Authentication Request.
Once the SAML Authentication Request is sent to IdP, a SAML response is returned to Assertion Consumer Service.
Below is our ACS service, which handles the SAML response coming from IdP. In our case, the ACS service also sets the session details if the auth response is successful and redirects to the dynamic profile page.
Now that the login flow is complete, let us create a basic logout flow as below:
When the user clicks on the logout button, it sends a request at /logout/, which will invalidate the user’s session and redirect the user to the home page.
This is how our home URL function looks like: it renders a template.html file with input provided.
The complete main.py file can be found here.
The application’s UI is an HTML page with a “Login with SAML SSO” button that allows users to log in to the application using Okta.
Execution
To execute this app, start the Flask server:
With this, your application will be available at https://localhost:8443/.
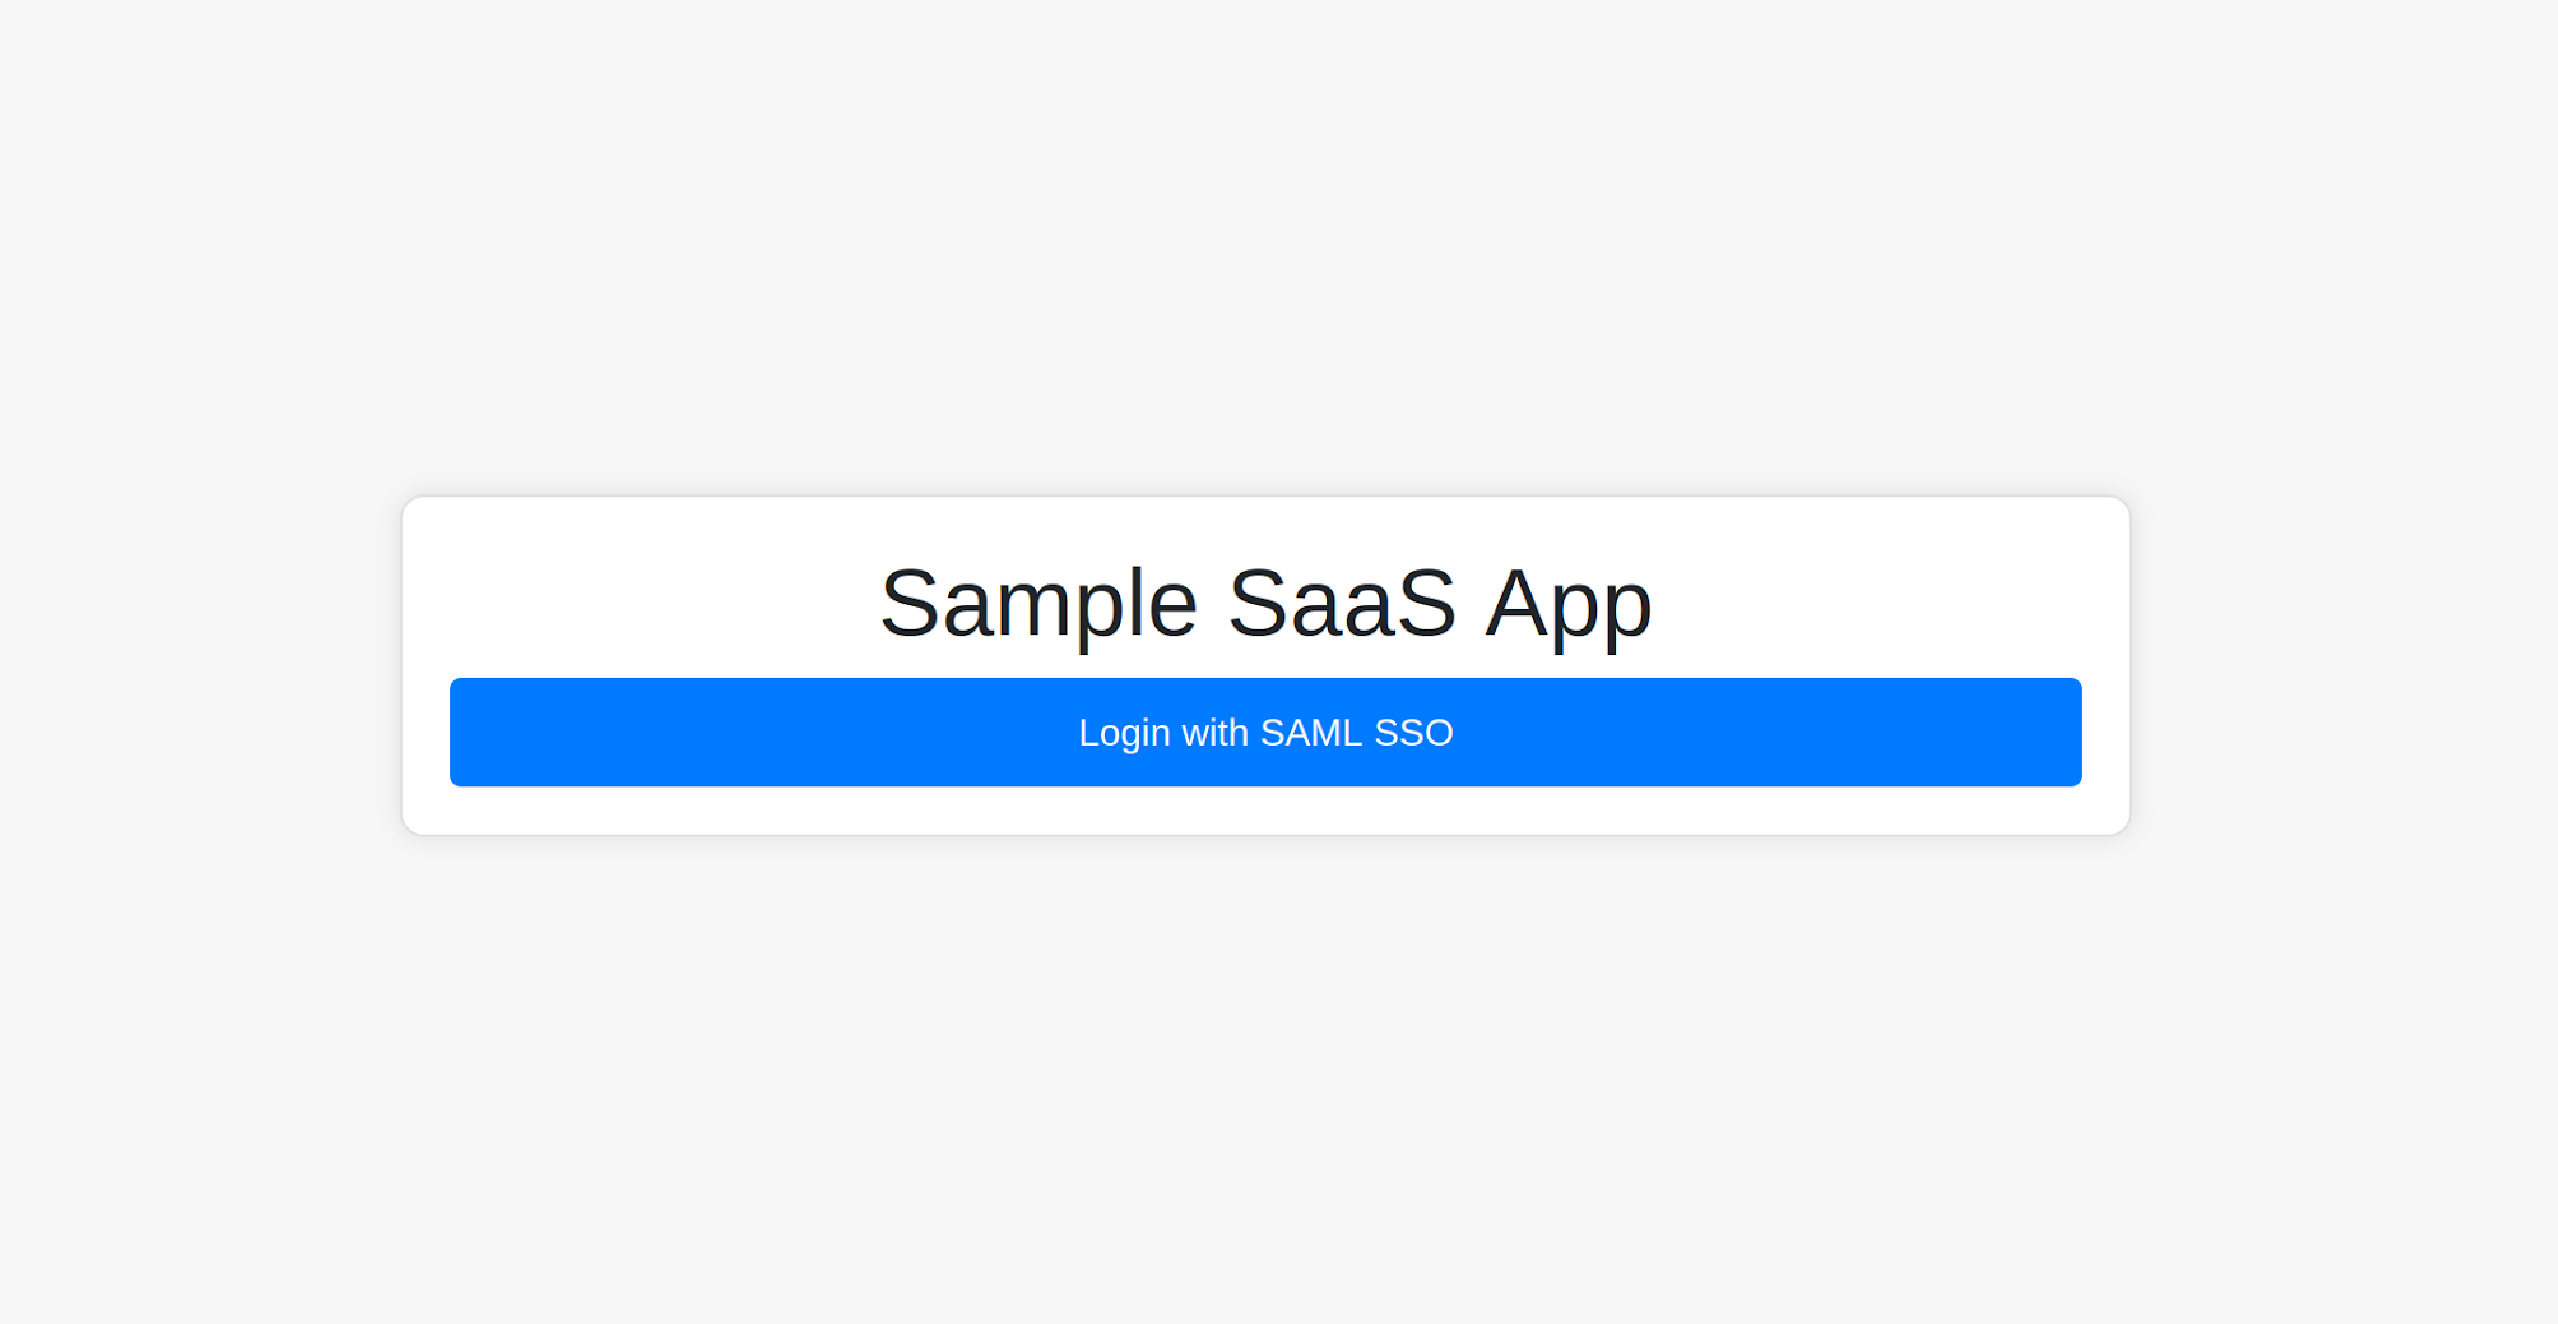
You can log in to the app by clicking the Login with SAML SSO button; it should redirect you to the Okta login page.
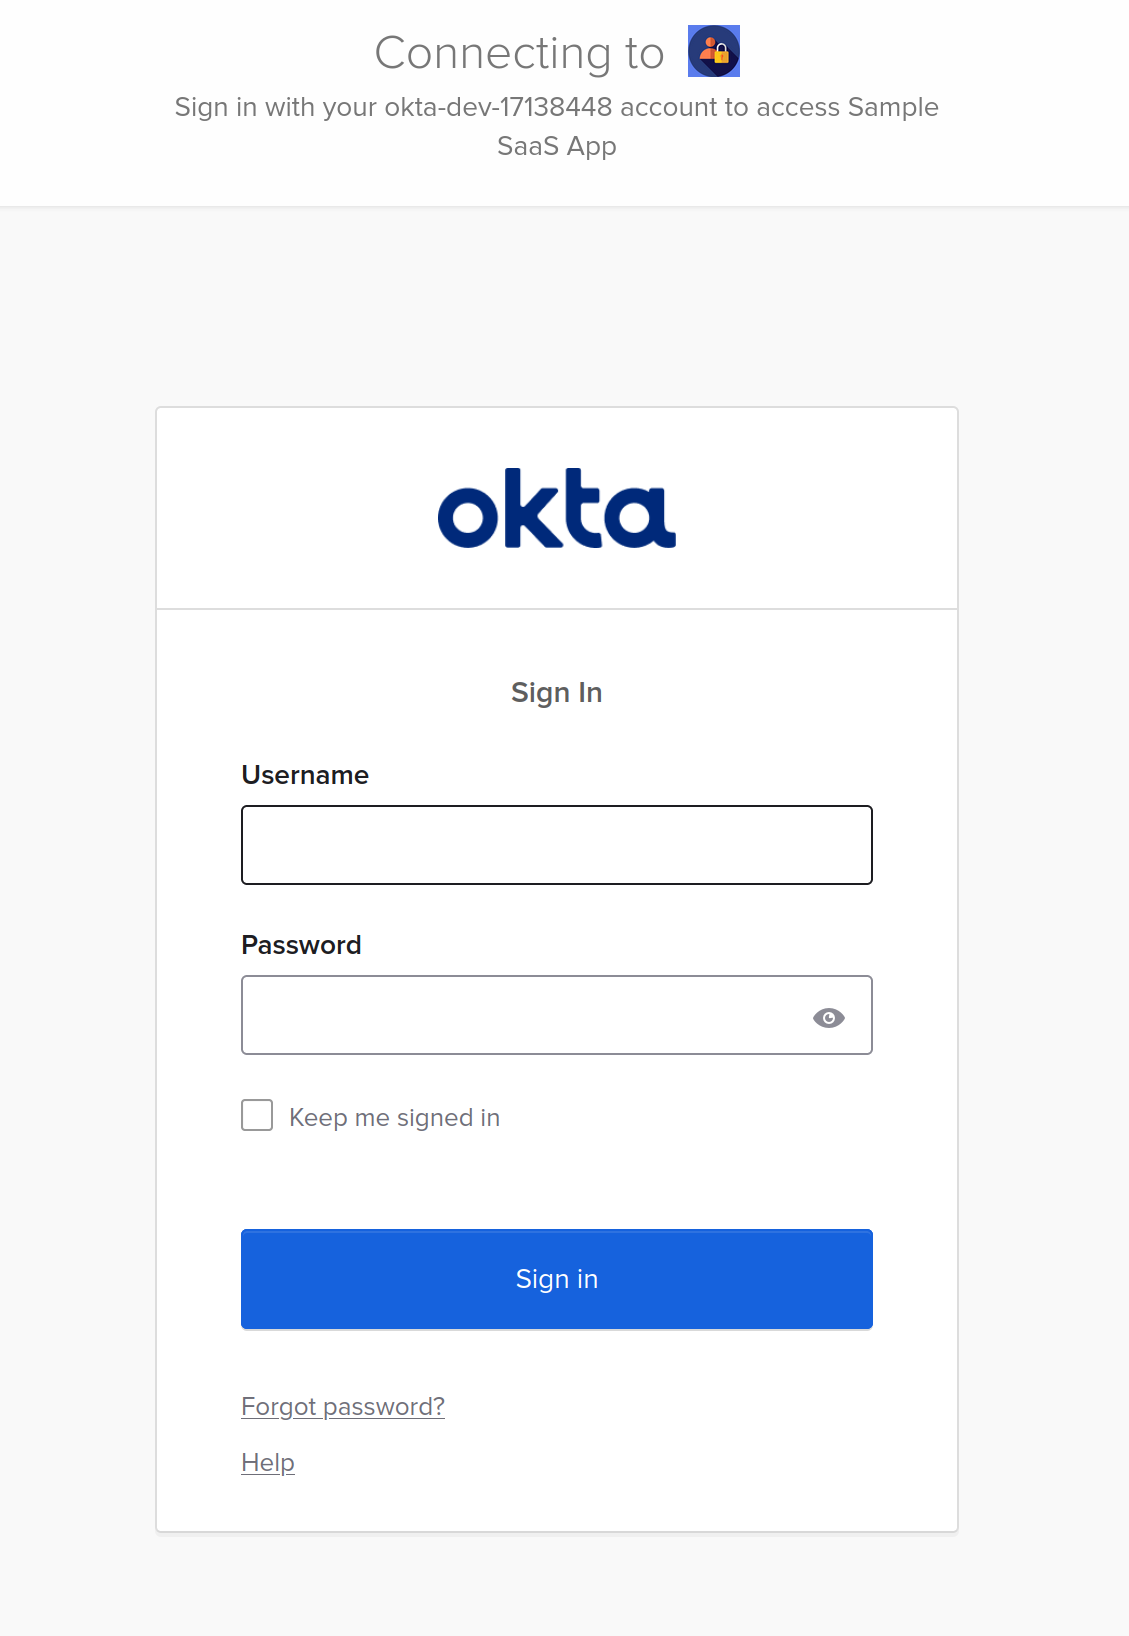
Use the credentials of the user that was assigned to the application.
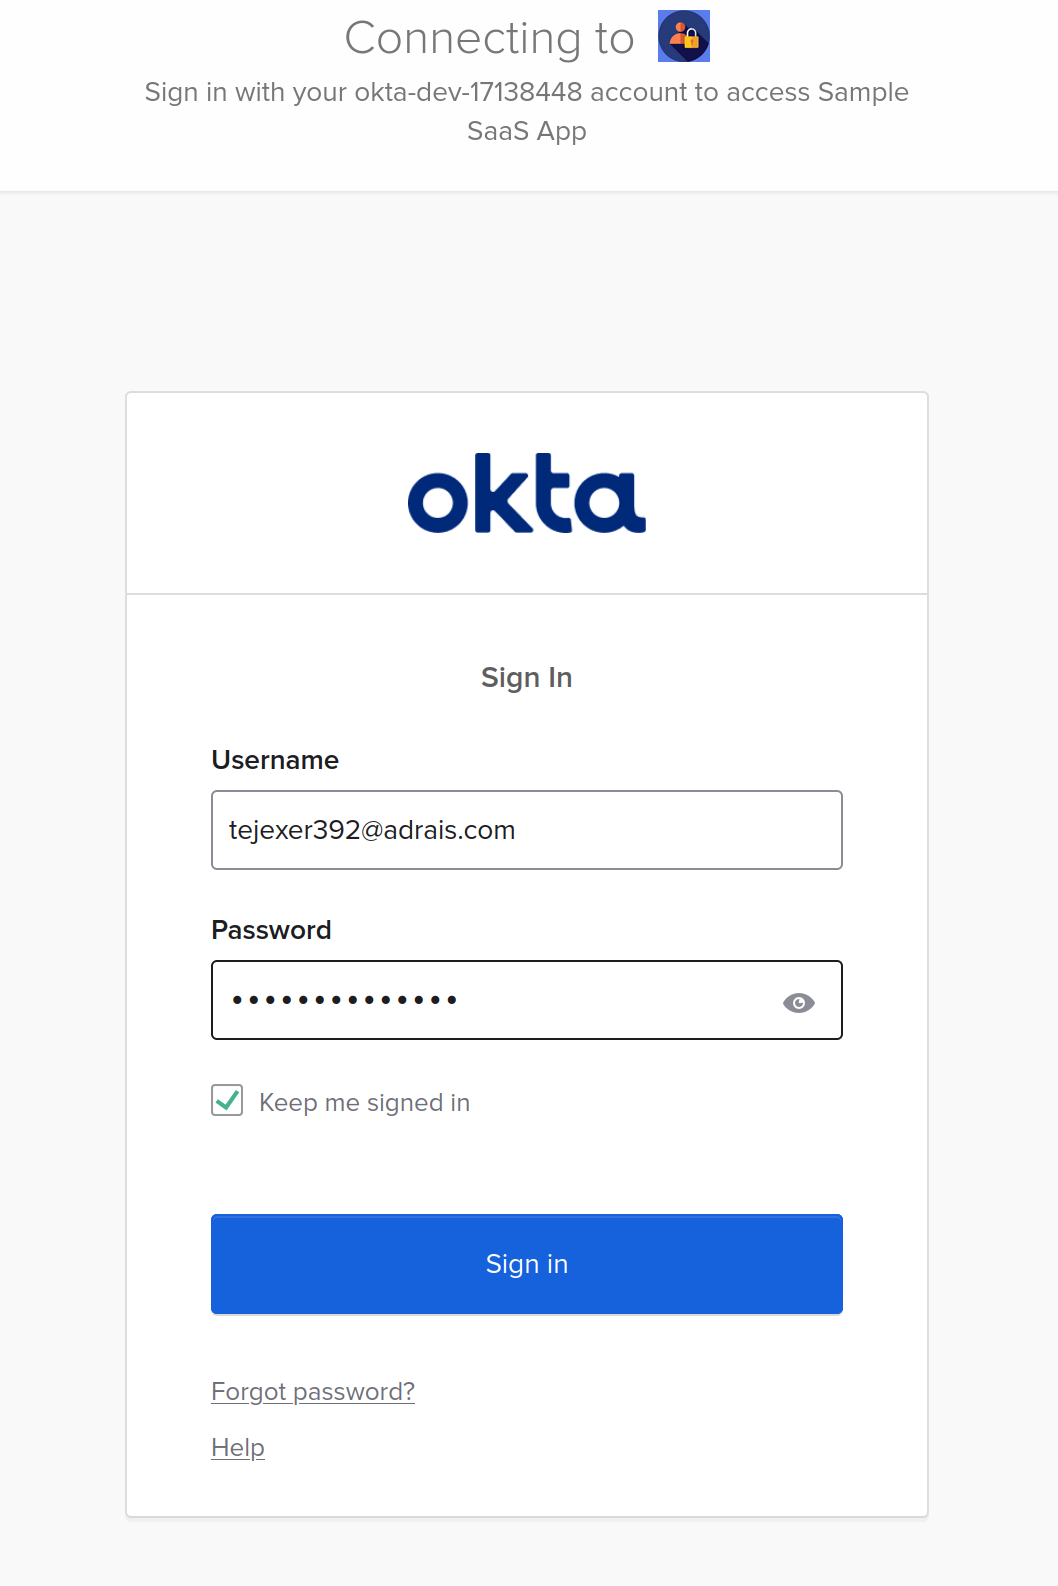
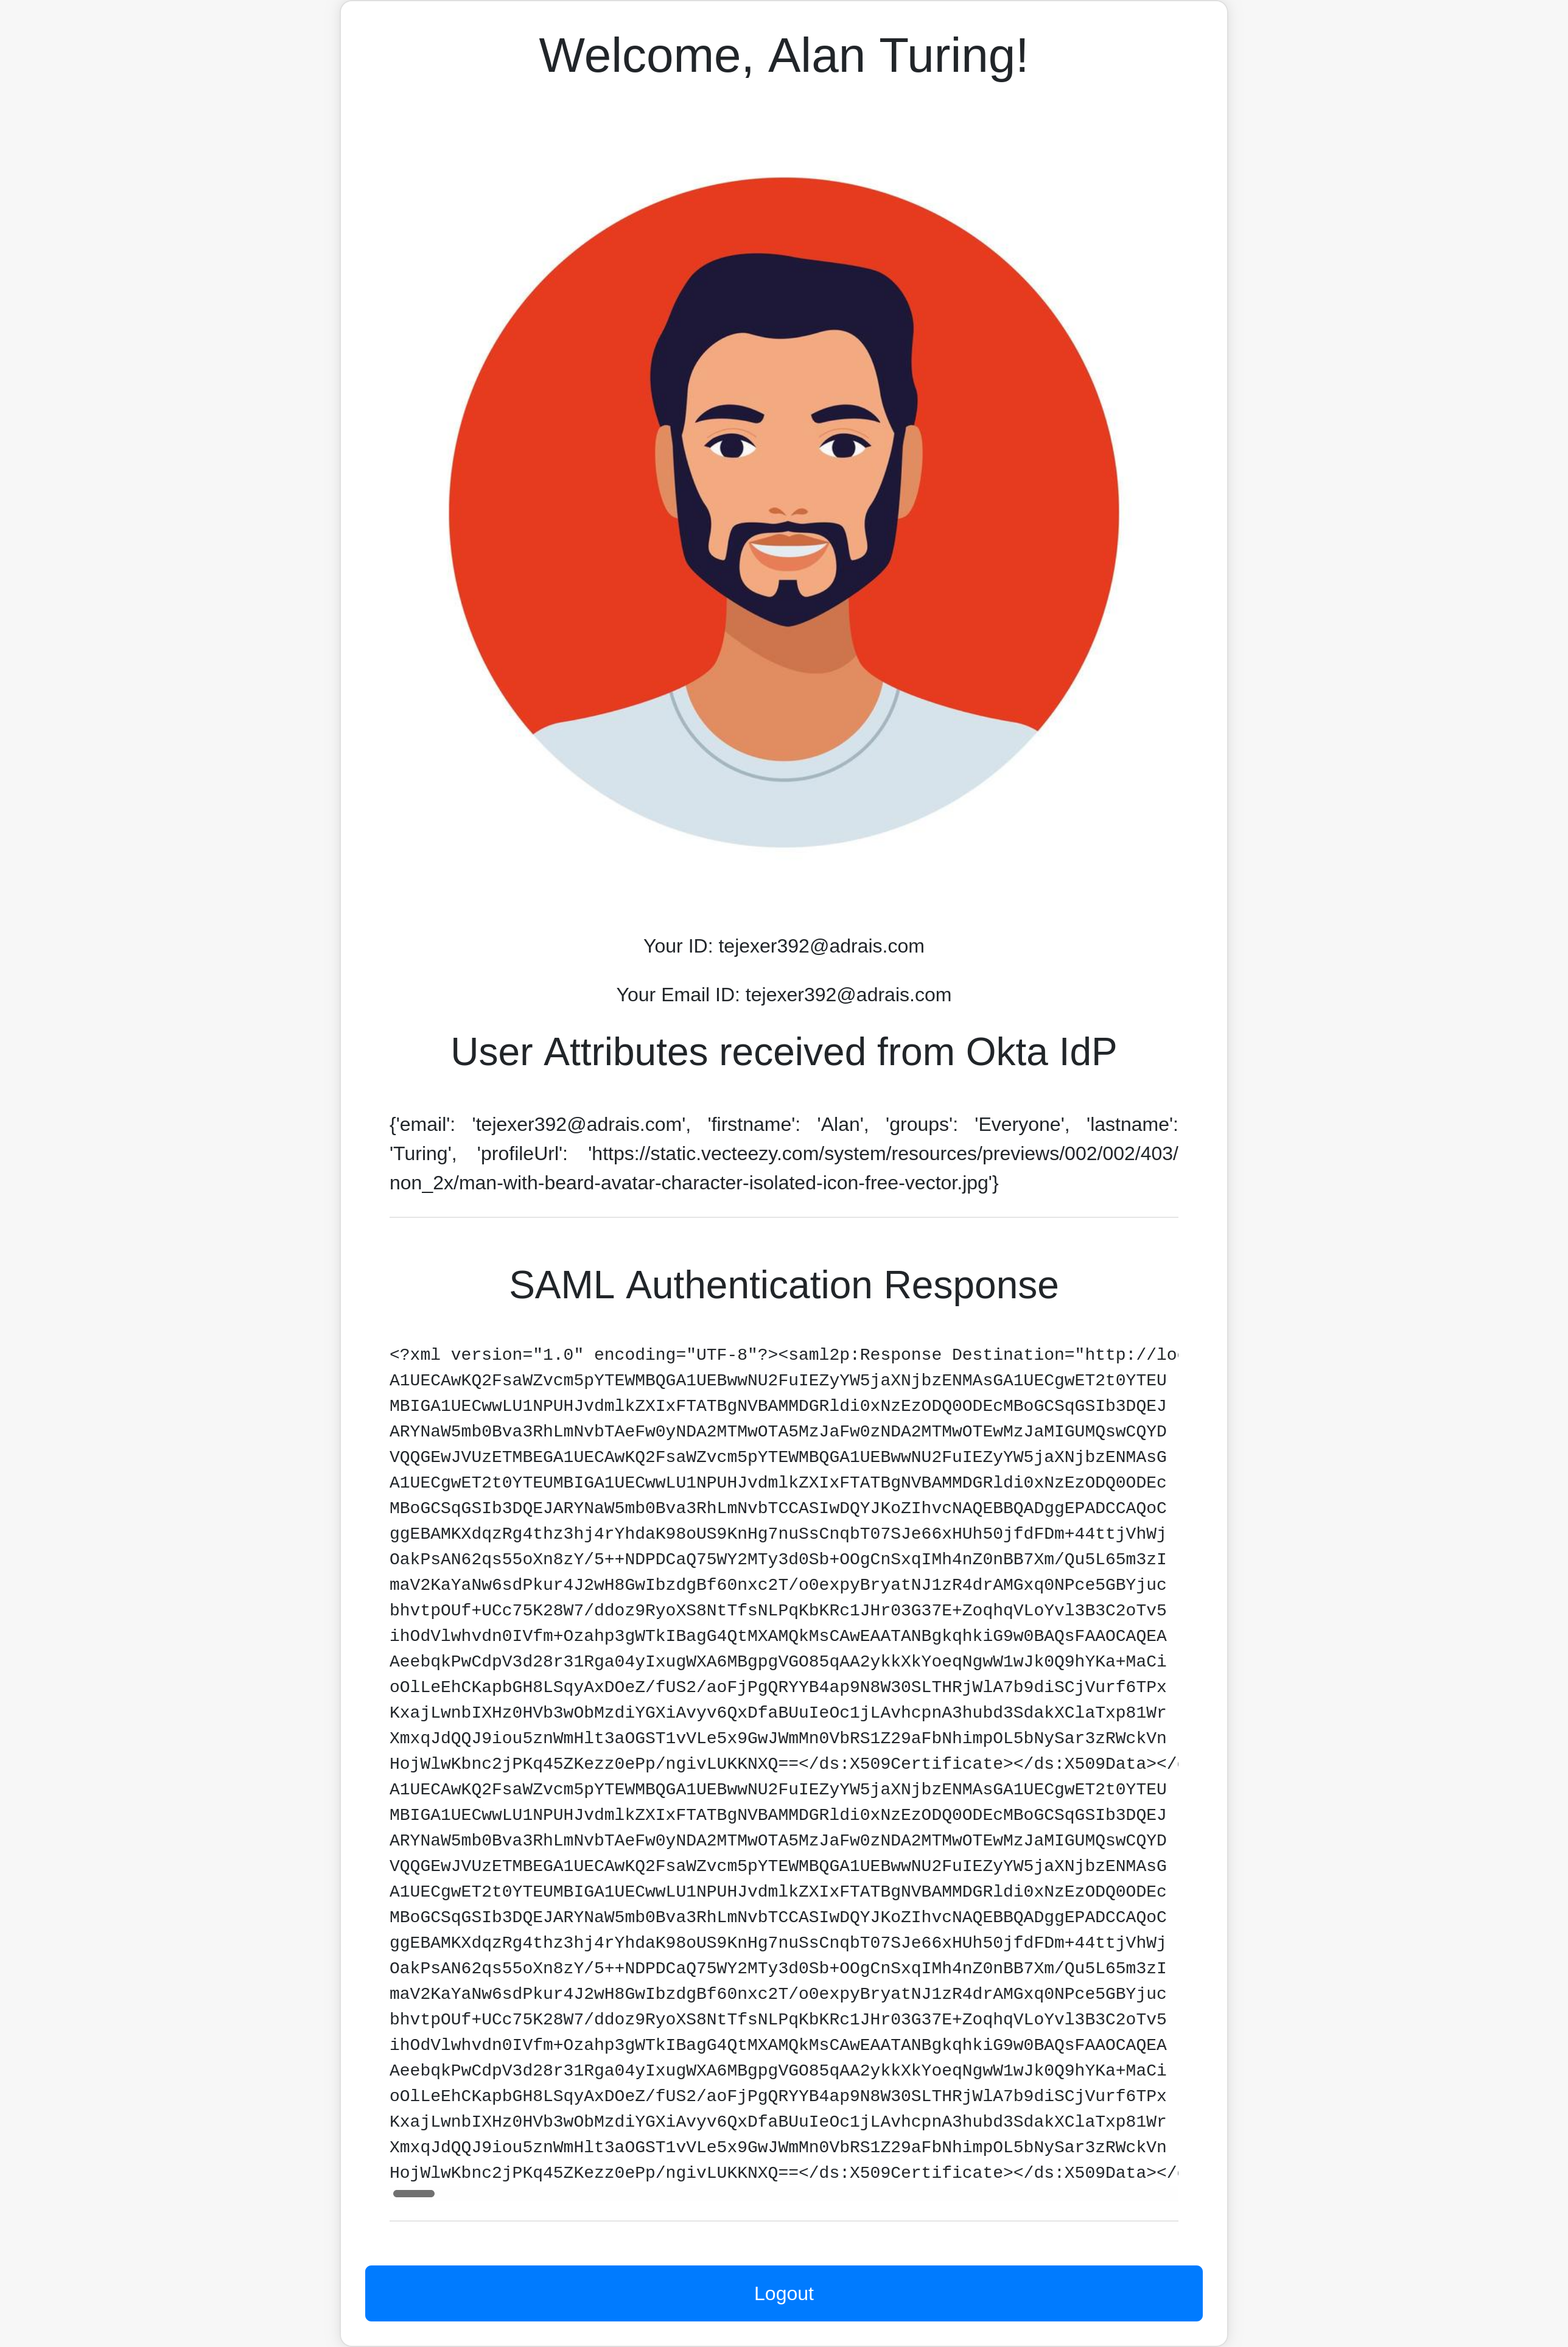
Okta should send a SAML response to the ACS service endpoint on the SP application after clicking login and entering details. The ACS endpoint should redirect you to home with the logged-in session with the below details.
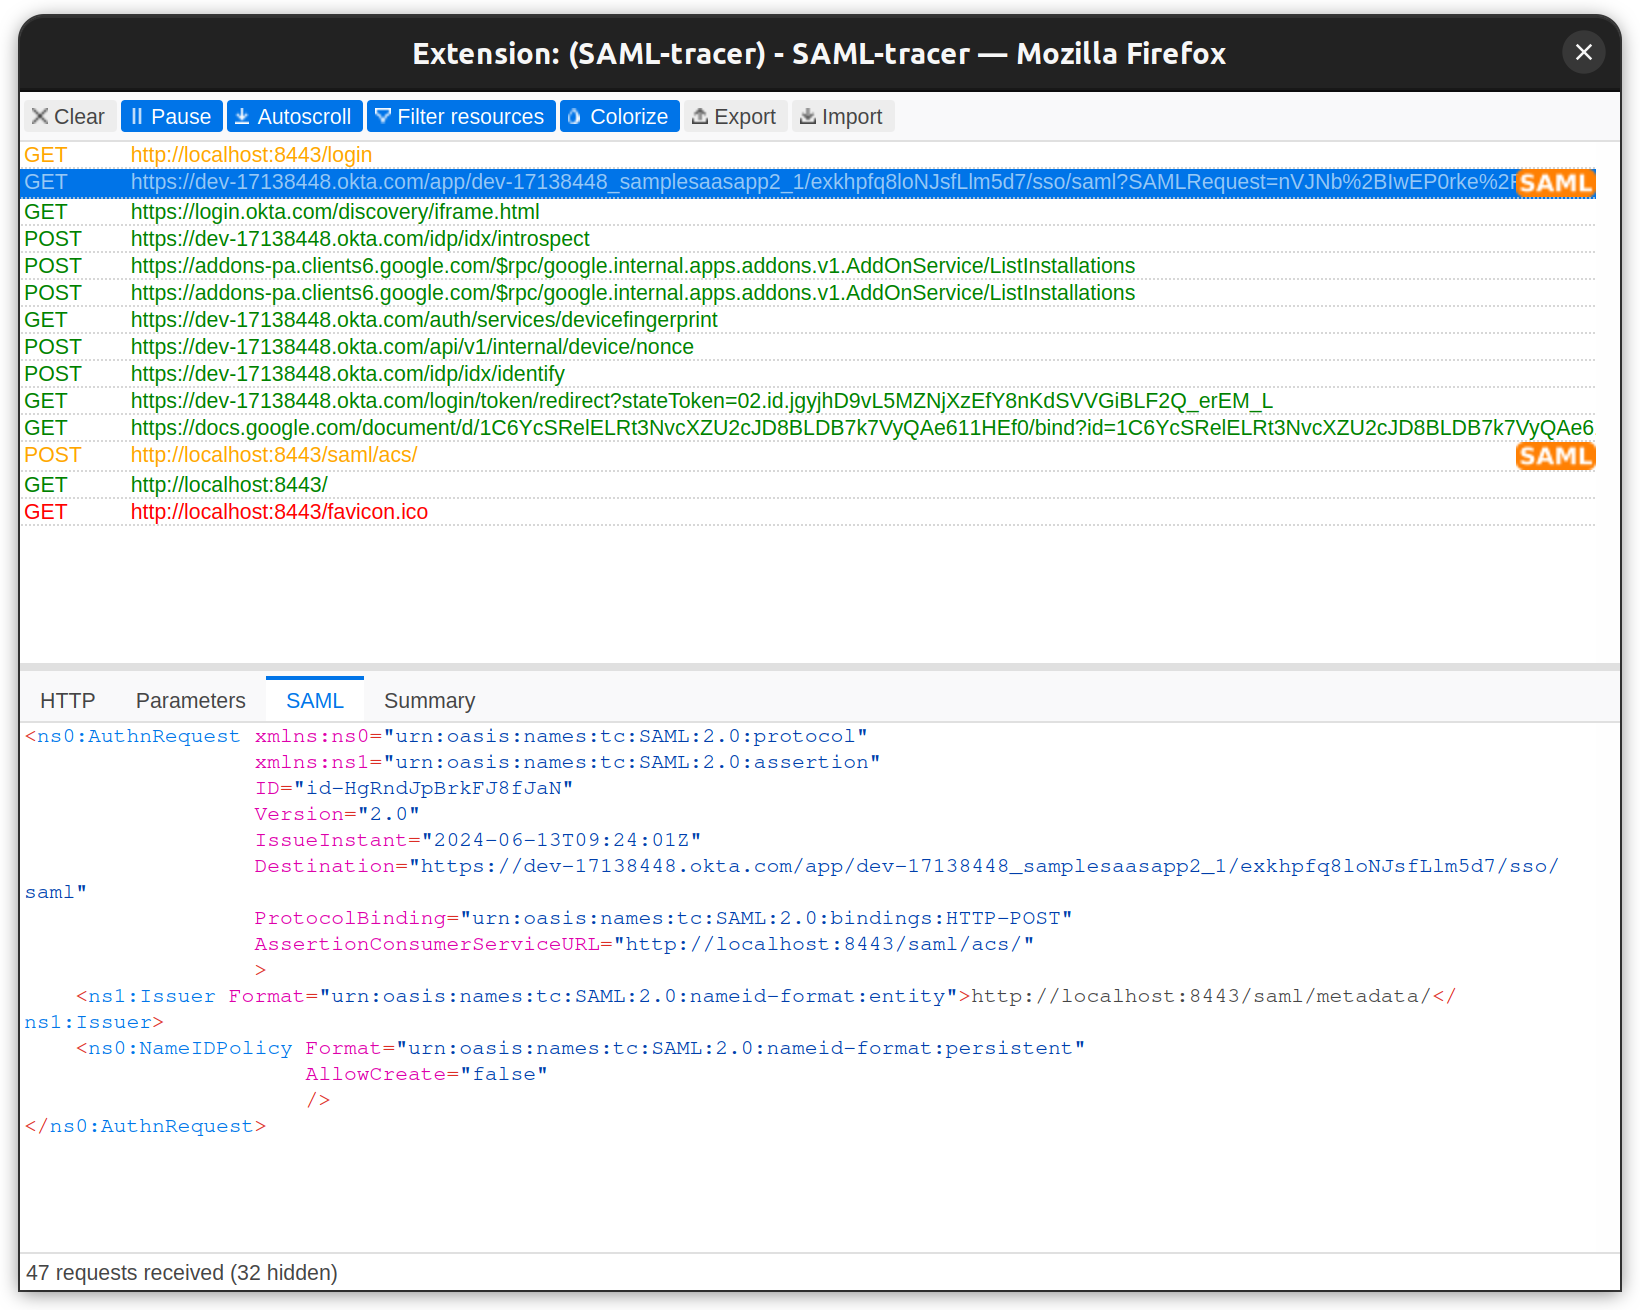
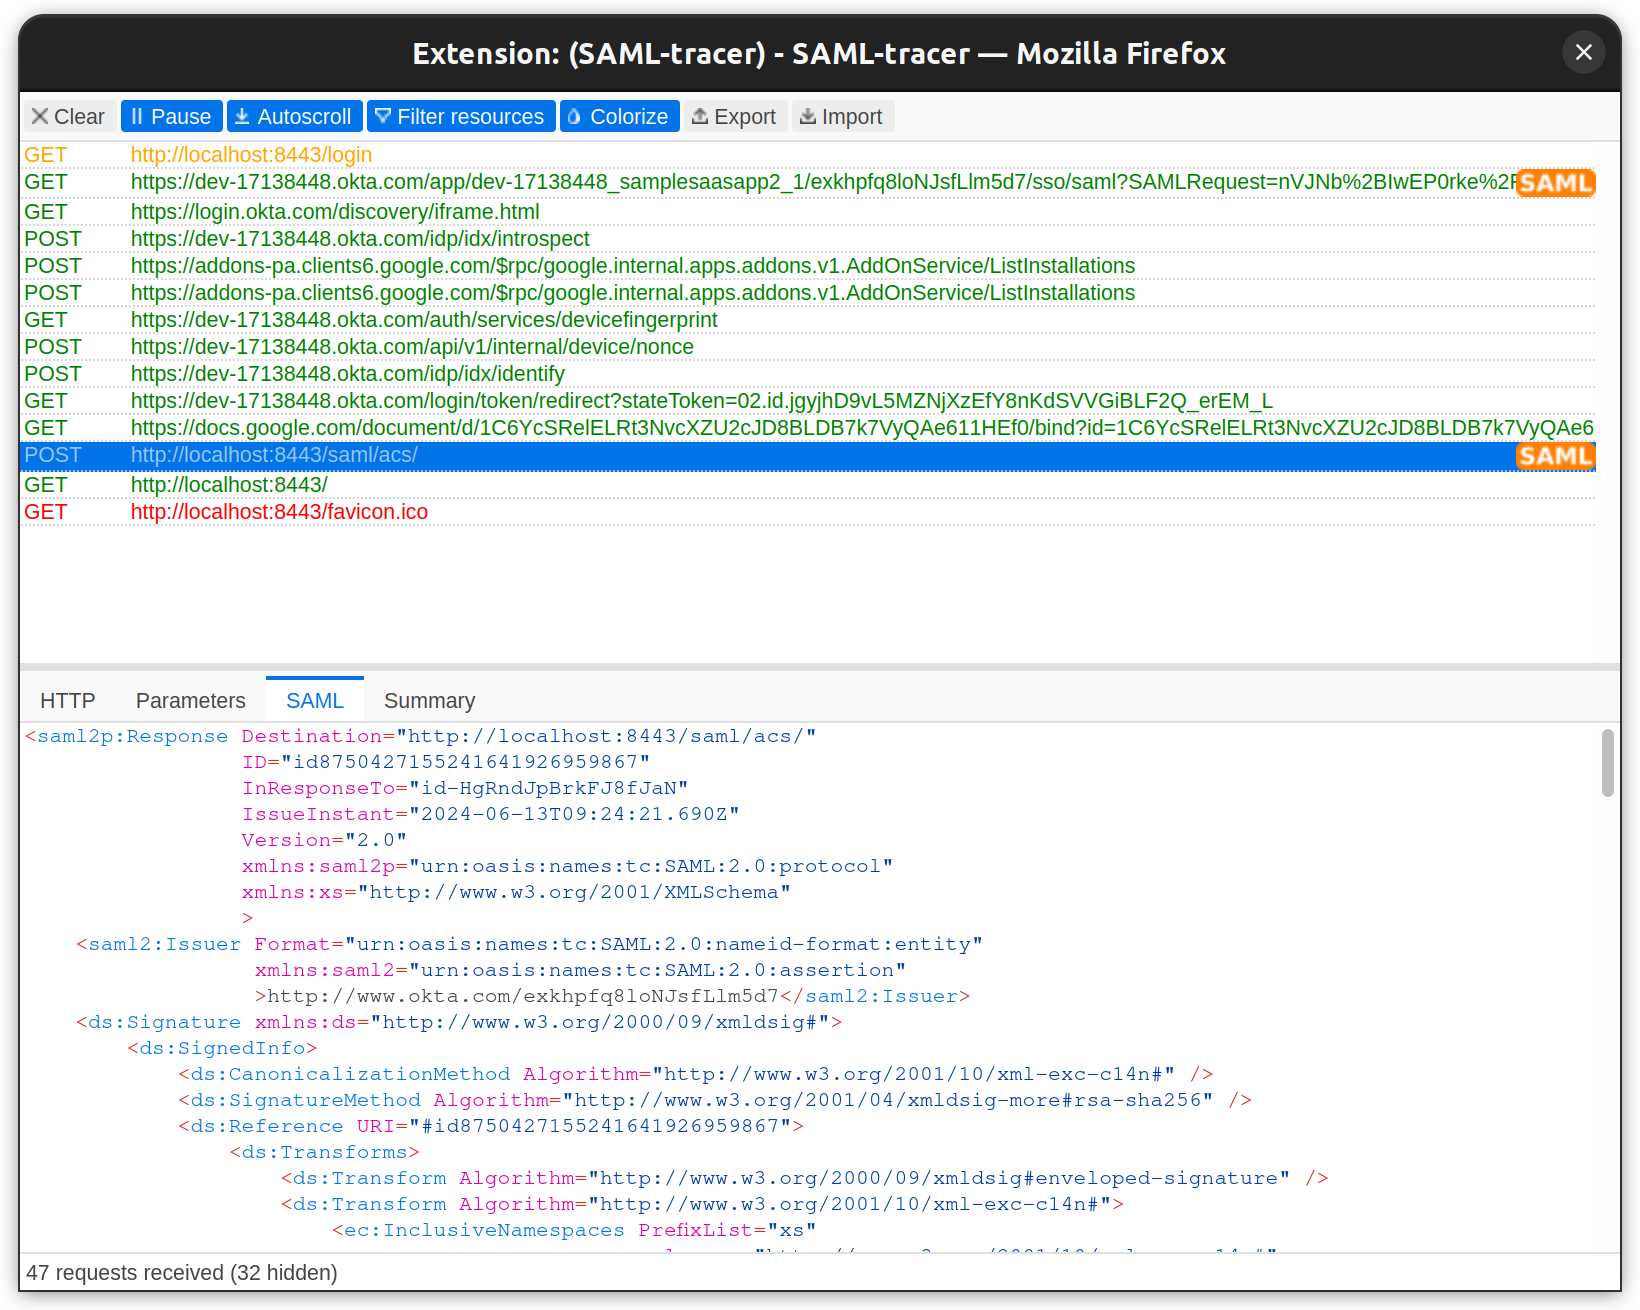
The SAML tracer extension, available for Firefox and Chrome, provides details behind the scenes.
Below is the SAML Request sent to IdP:
Below is the SAML response from IdP:
After a successful login, you can see the full name, first name, last name, email ID, and user profile picture.
That’s how you configure Okta SSO SAML for a web application. You can replicate this on any other website.
SAML best practices
The example we went through was a simple web app that was integrated with SAML 2.0 SSO for development purposes. However, production setups are more complex, with many applications, users, and workflows.
Here are some best practices for implementing SAML 2.0 that you can adopt:
- Enable logging: Implementing logging to track authentication attempts, failures, and other security issues. This helps with auditing and compliance.
- Validate schemas: Ensure that SAML messages conform to the defined XML schemas to prevent XML signature wrapping attacks and other vulnerabilities.
- Using secure libraries: Leverage secure and up-to-date XML libraries to mitigate vulnerabilities like XML External Entity (XXE) attacks.
- Using canonicalized XML: To prevent signature wrapping attacks, use Canonicalized XML documents before verifying signatures.
- Handle XML-signed certificates: Validate and enforce certificate trust chains, revocation checks, and other certificate-related security measures.
- Choosing the right certificate: Use only SHA-2 certificates when designing new SAML workflows; don’t use self-signed certificates.
- Limit XML parser: Restrict the XML parser's capabilities to prevent potential vulnerabilities like XXE and other attacks.
- Use TLS: TLS v1.2 is the preferred protocol when establishing a connection to the SP.
- Encrypted assertion: The SAML Assertion should be encrypted.
- Leverage SingleLogout if using Okta: Okta's Single Logout (SLO) feature allows a user to automatically sign out of all other SLO-participating apps on other devices.
If you'd like to dive deeper, take a look at our SAML vulnerability handbook.
Conclusion
A centralized identity store like Okta is no longer an option but a necessity for enterprises. It is equally important for SaaS applications to support such IdPs that other organizations' IT departments trust and feel comfortable using. Today, companies deal with multiple B2B SaaS applications, making a centralized identity crucial for streamlining access and management. Enabling and integrating IdPs into your applications provides a good user experience, such as one-click sign-in (SSO).
While Okta is a popular provider, others like Auth0 are also available. Some organizations may prefer Okta, while others might choose different IdPs. Configuring each IdP in a SaaS application can be a tedious process and is prone to errors and security issues.
This is where Scalekit can help. Designed for SaaS engineering teams, Scalekit enables quick integration of authentication into apps using SDKs and APIs, making it a reliable choice for SAML integrations in applications.
If you'd like to get enterprise auth up and running in days, check out Scalekit's core auth solution.


